Stone Countertops: The Heart of 2026 Kitchen Trends
Stone countertops have become a defining element of modern kitchen design, combining durability with timeless visual appeal. From minimalist interiors to warm, natural arrangements, the right countertop can completely transform the character of a kitchen.
In this 2026 kitchen gallery, we’ve curated 110 stunning kitchen design ideas featuring the latest trends in stone countertops. Discover how various materials, textures, and layouts come together to create functional spaces that don’t just work well—they inspire.
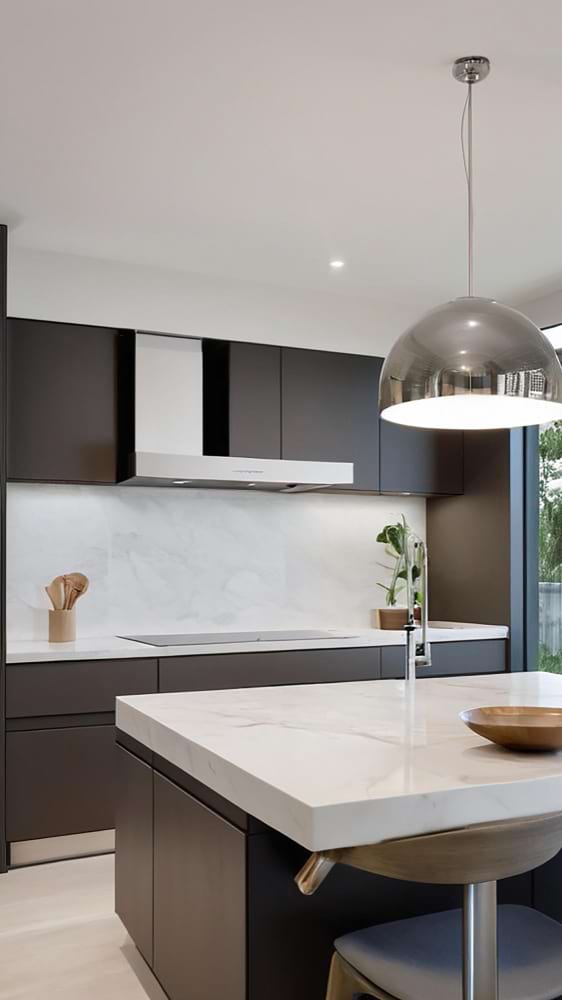
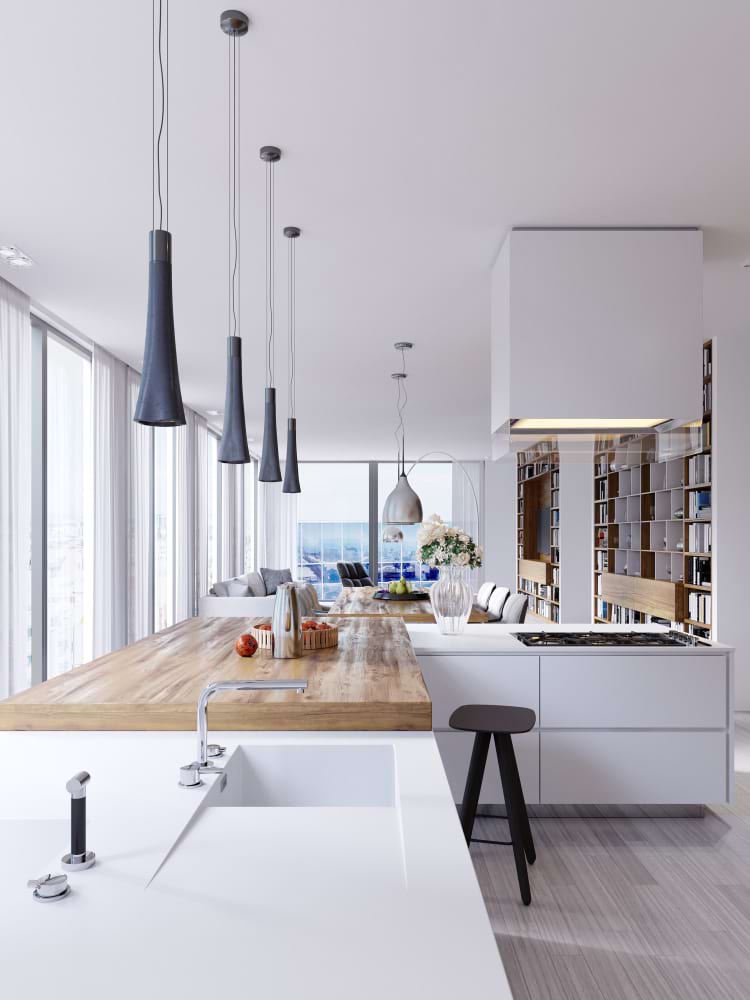
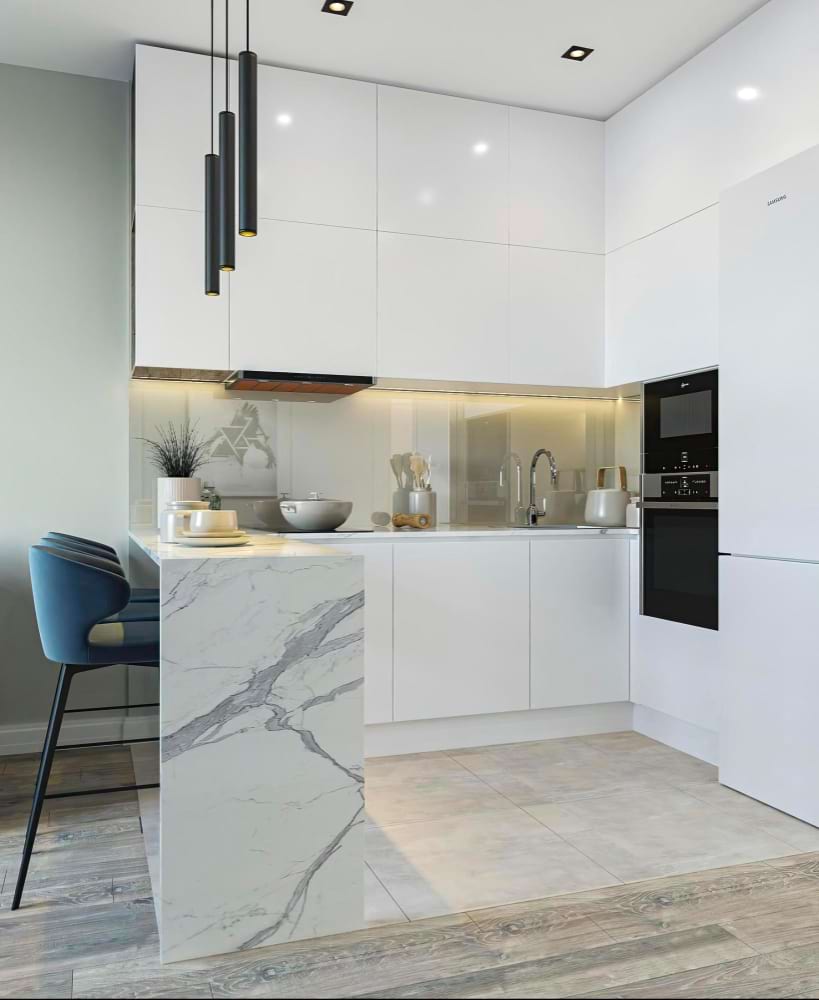
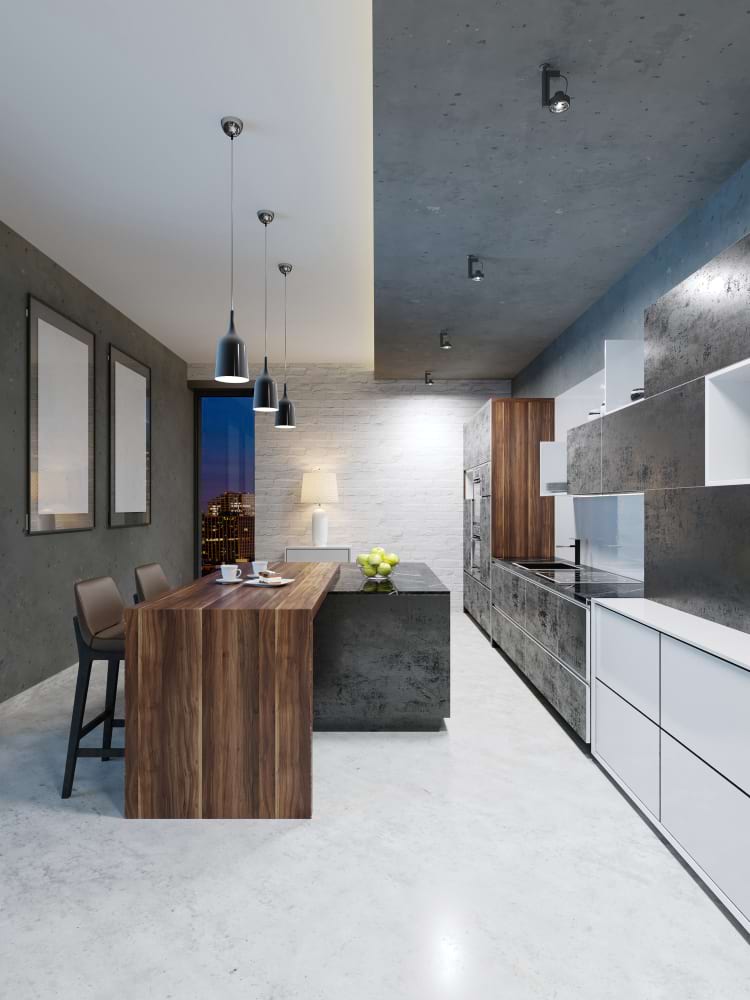
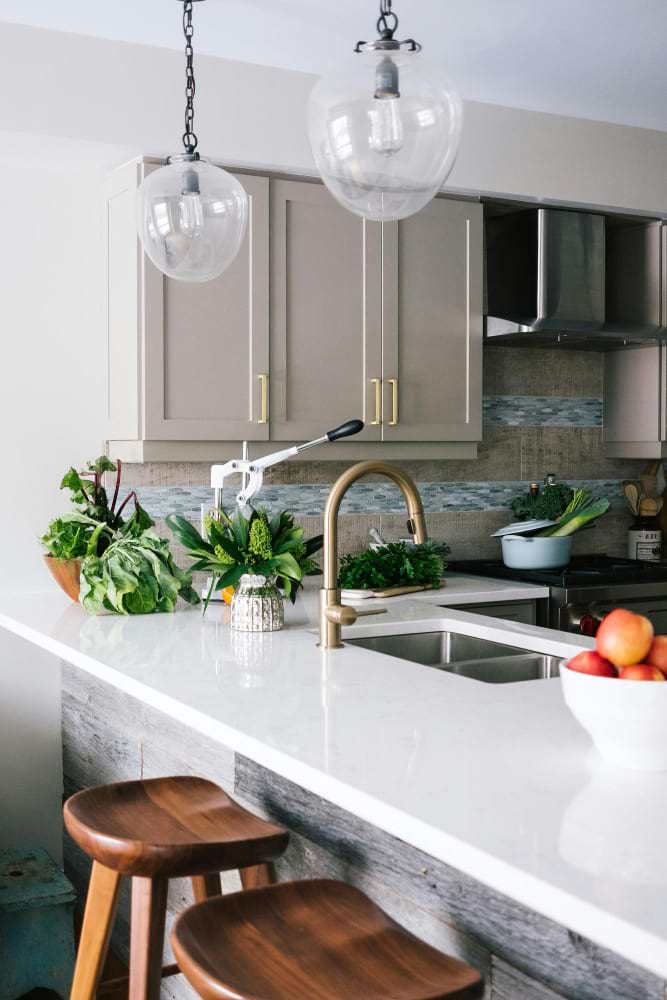
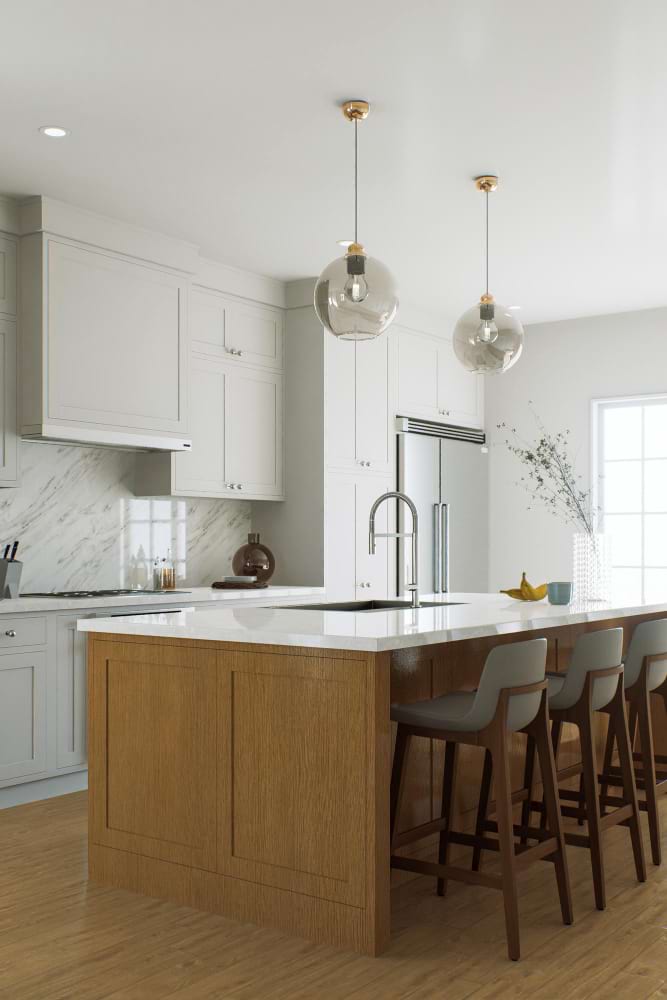
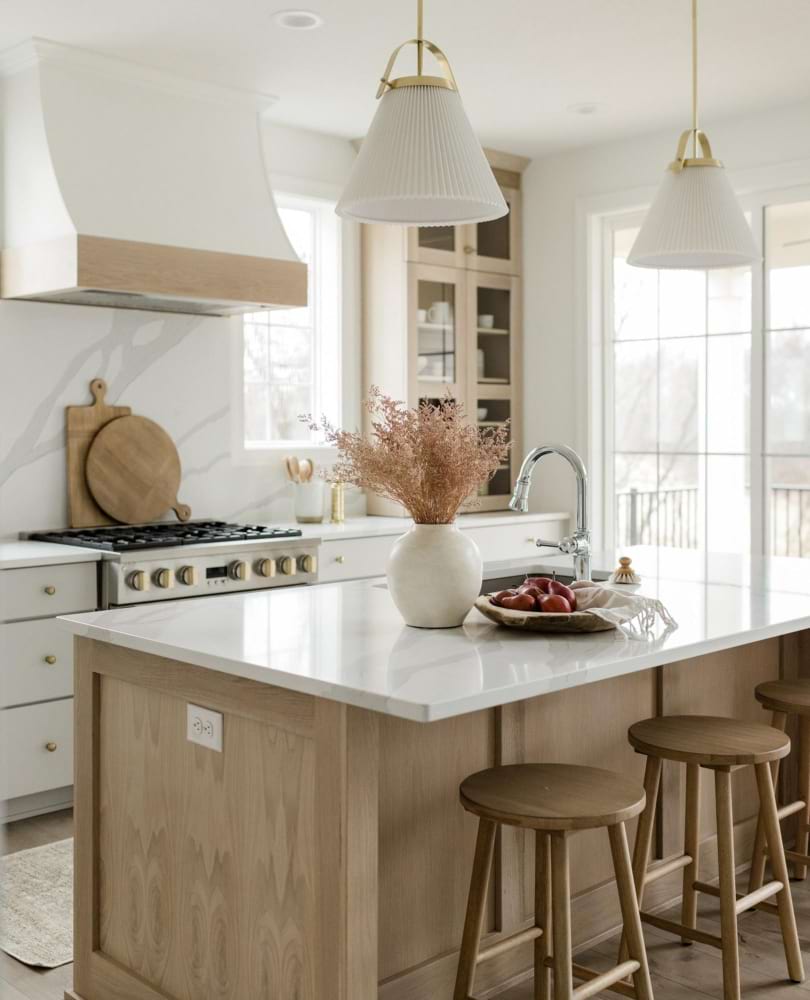
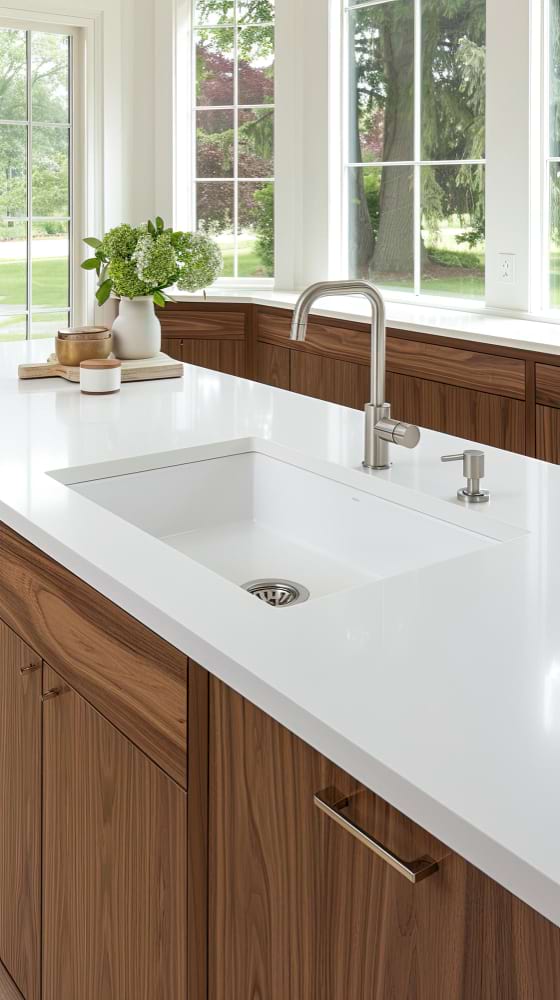
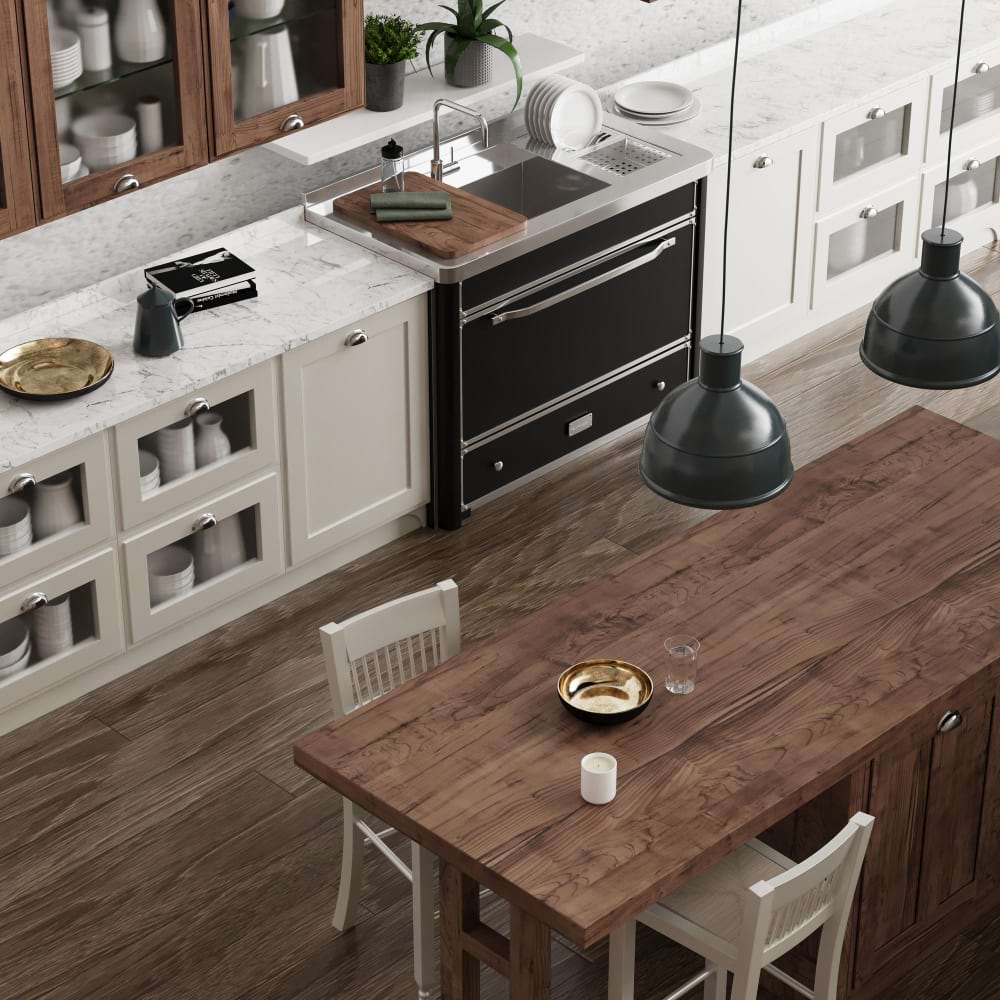
1. White & Grey Fusion with Brass Accents

A pristine white kitchen countertop features unique grey side cladding for a modern look. The design is perfectly complemented by a brass faucet, grey cabinetry, and wooden stools.
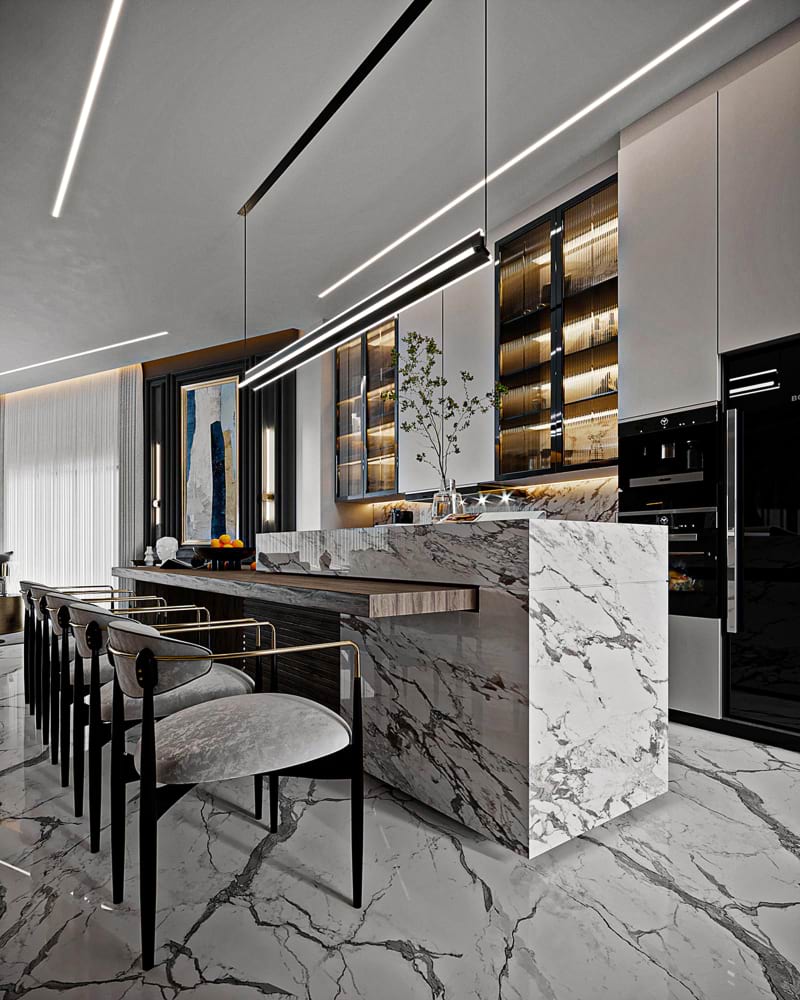
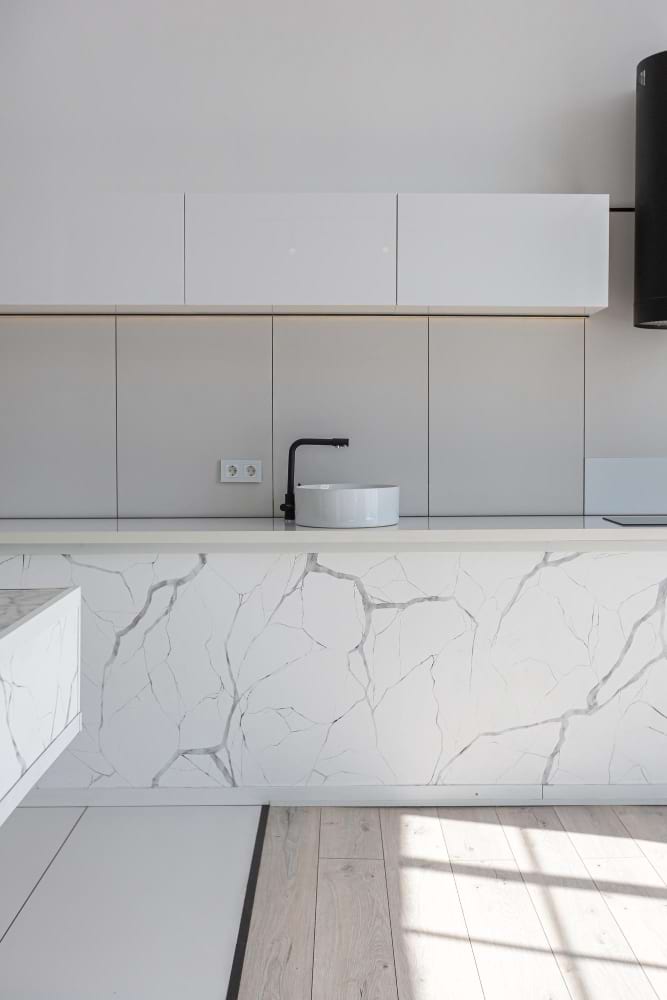
2. Marble Contrast: Grey Veins on White
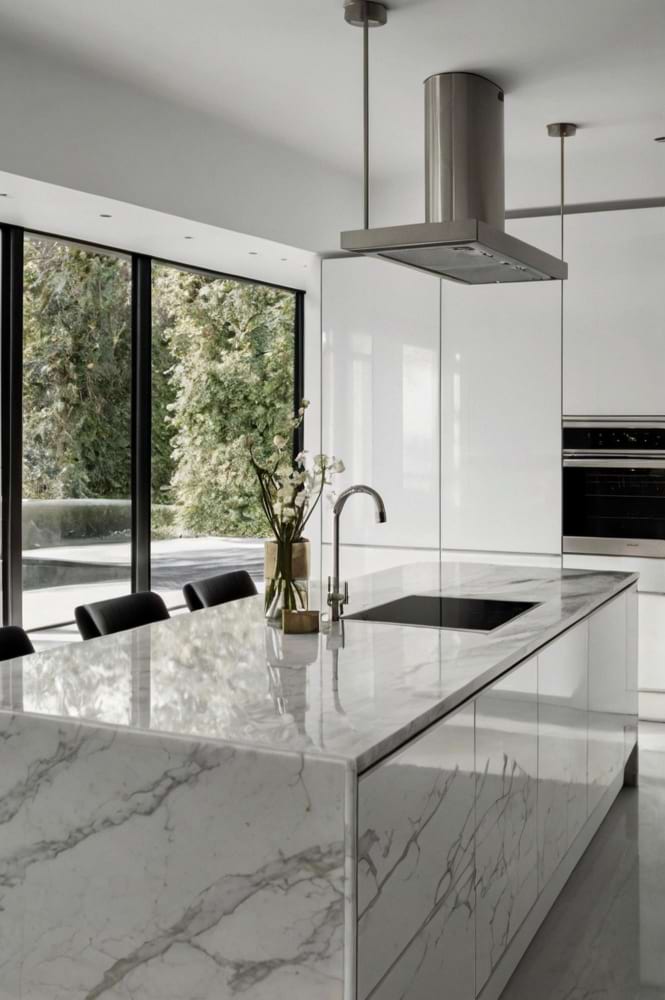
The kitchen island is clad in white-grey marble featuring characteristic dark grey veining. Paired with modern white cabinets and black chairs, it creates a striking and elegant contrast.
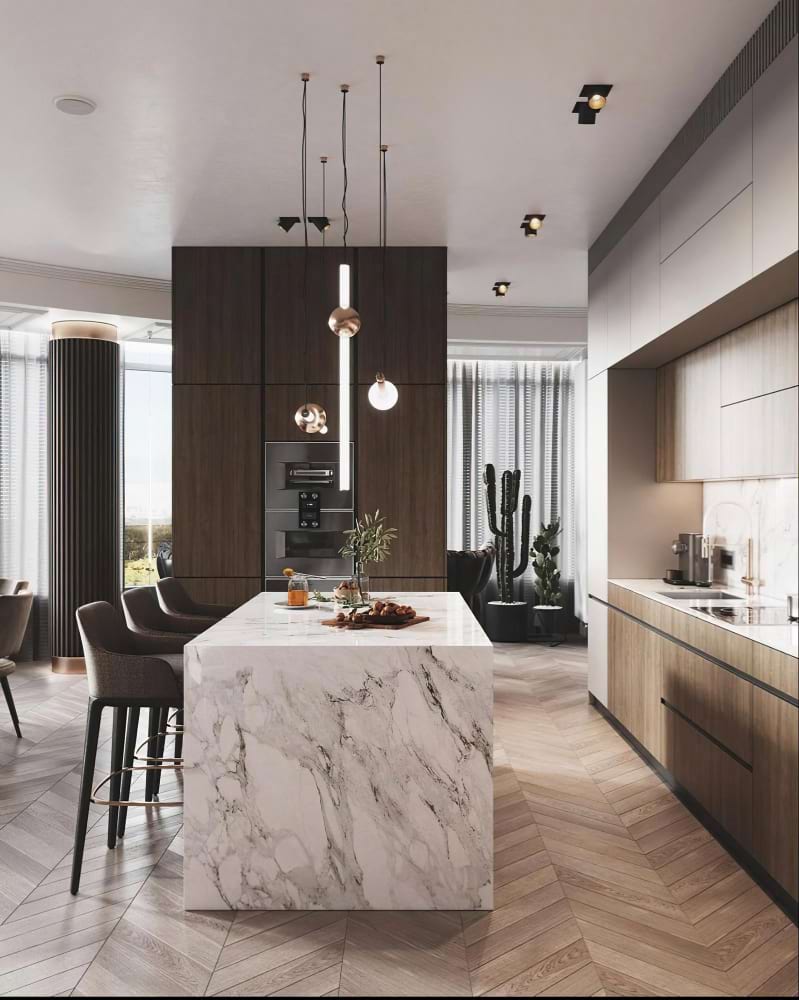
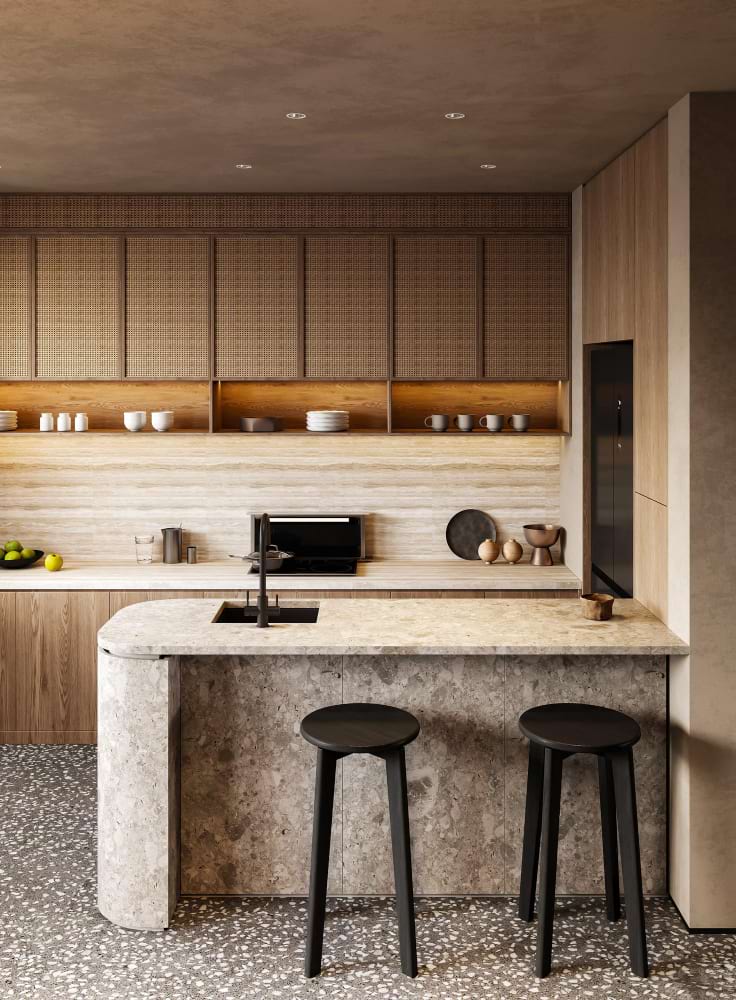
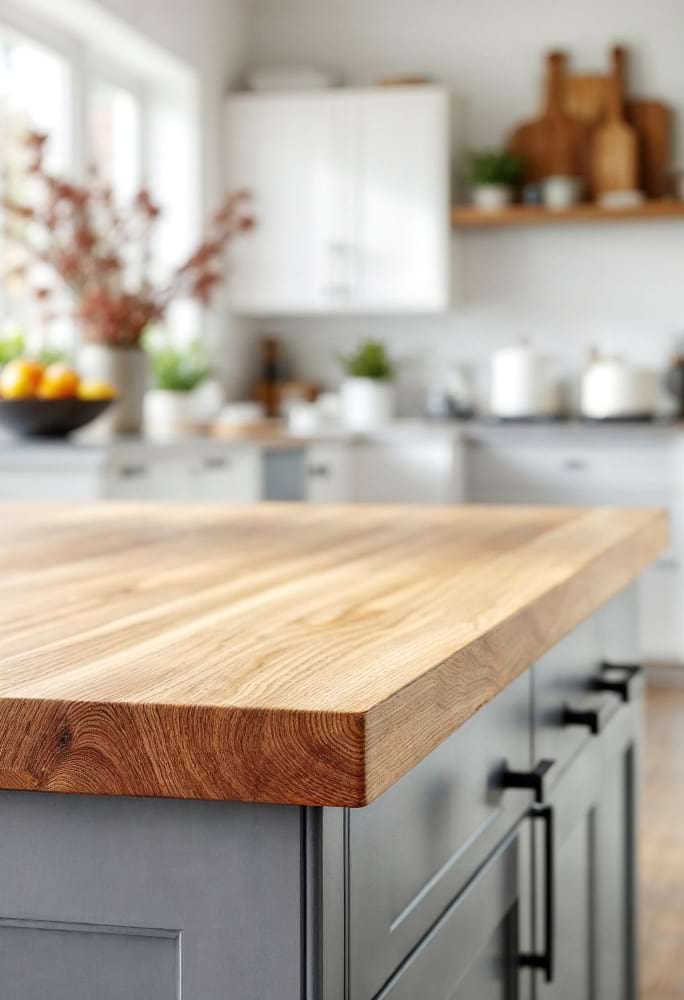
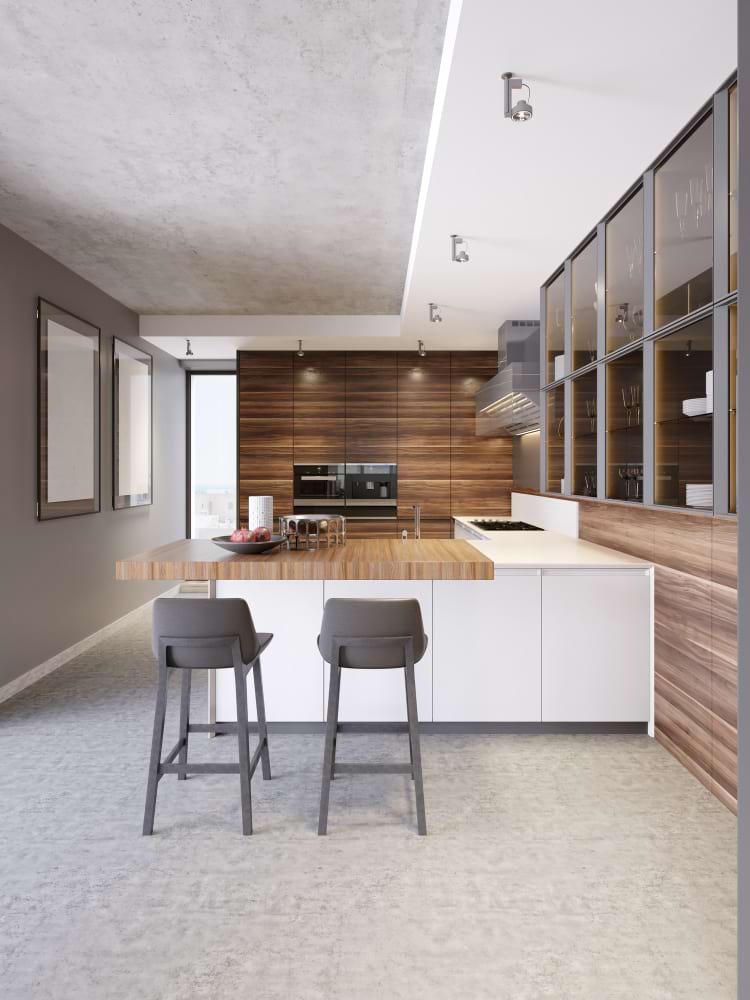
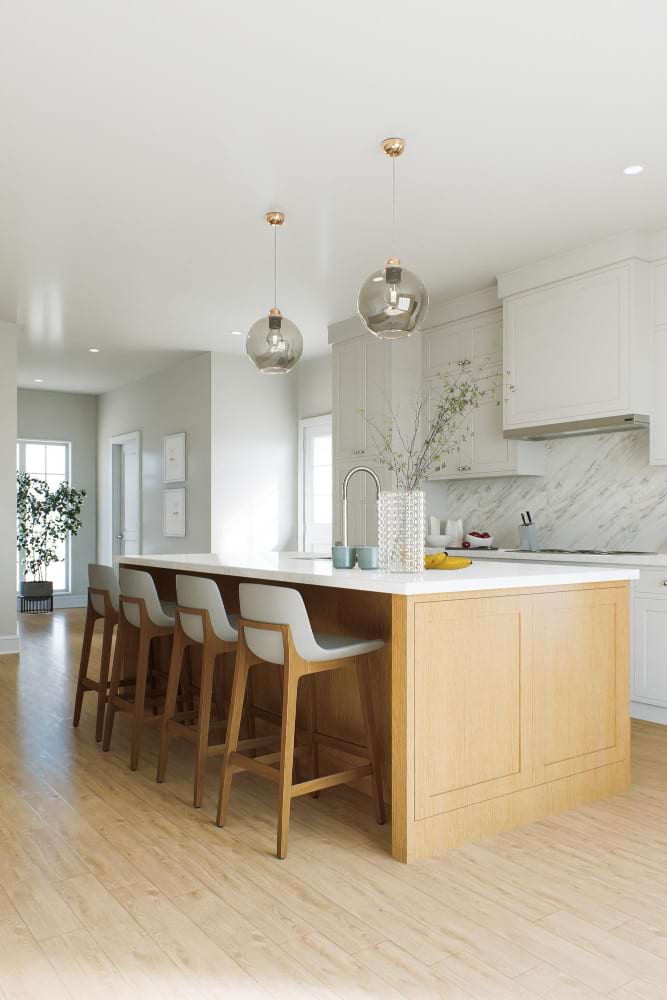
3. Natural Stone & Wood Warmth
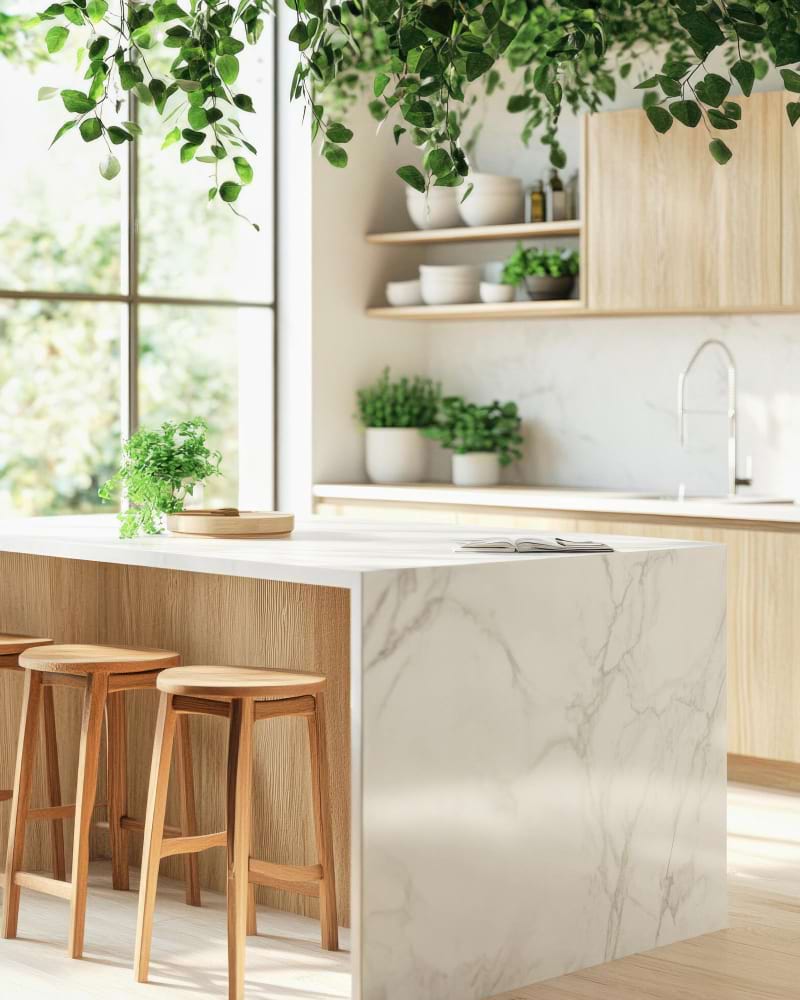
A bright island featuring natural light stone illuminates the interior. Combined with wooden cabinets and matching wooden stools, it creates a very interesting and warm mood.
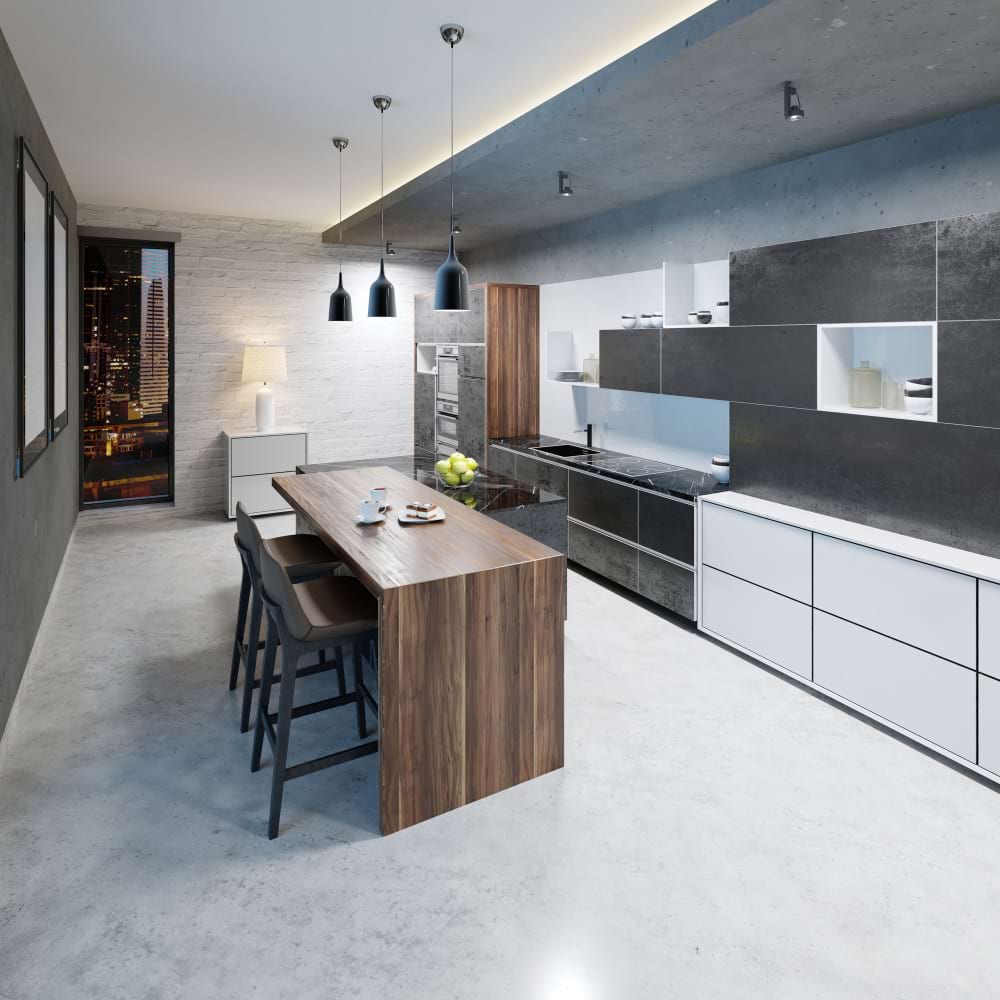
4. Integrated Lighting & Gas Cooktop
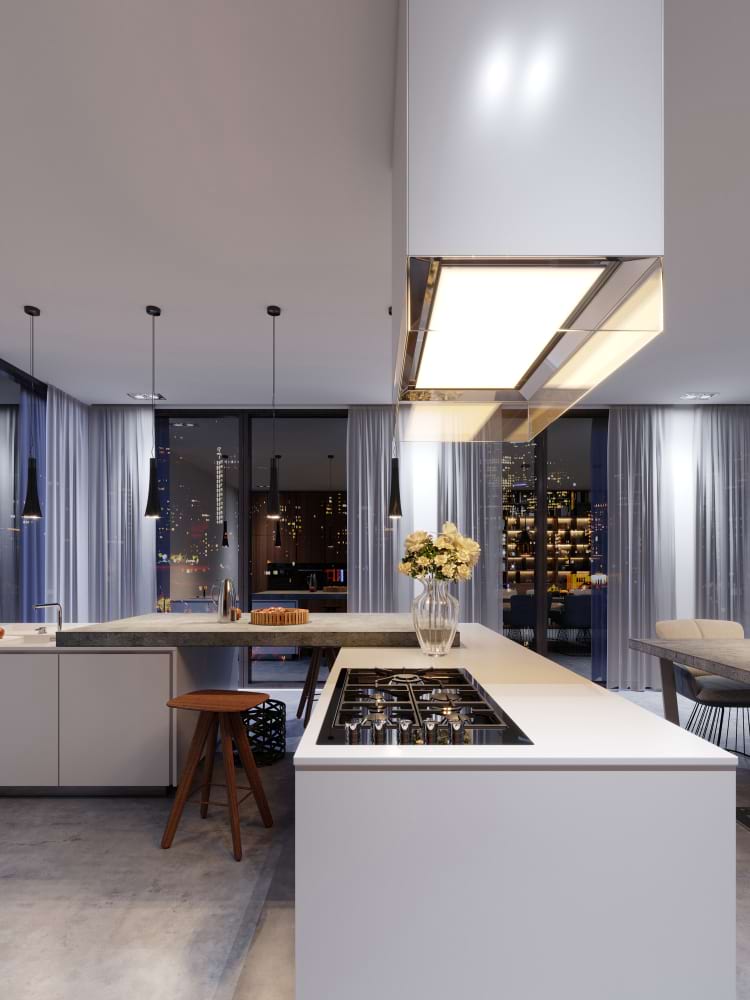
This modern kitchen combines white countertops with a grey stone element. The integrated gas cooktop and composed bright lighting create a captivating visual effect.
5. Elegant Balance with Metal Details
The smooth, light-colored countertop brings a sense of elegance and balance, beautifully contrasting with the darker accents. The lamp and metallic elements of the chairs fit perfectly together.
6. Wood & Stone Harmony
A bright, stone-inspired countertop adds a refined touch against deep, matte cabinetry. The island features a wooden top, while the flooring mimics the marble tone of the workspace.
7. Pastel Tones & Light Marble
The bold marble-patterned countertop becomes the focal point, adding depth and luxury. Paired with dark cabinetry and warm metallic accents, it creates a refined interior. A modern light marble island pairs well with wooden cabinets, muted pastel tones, and wood-effect flooring.
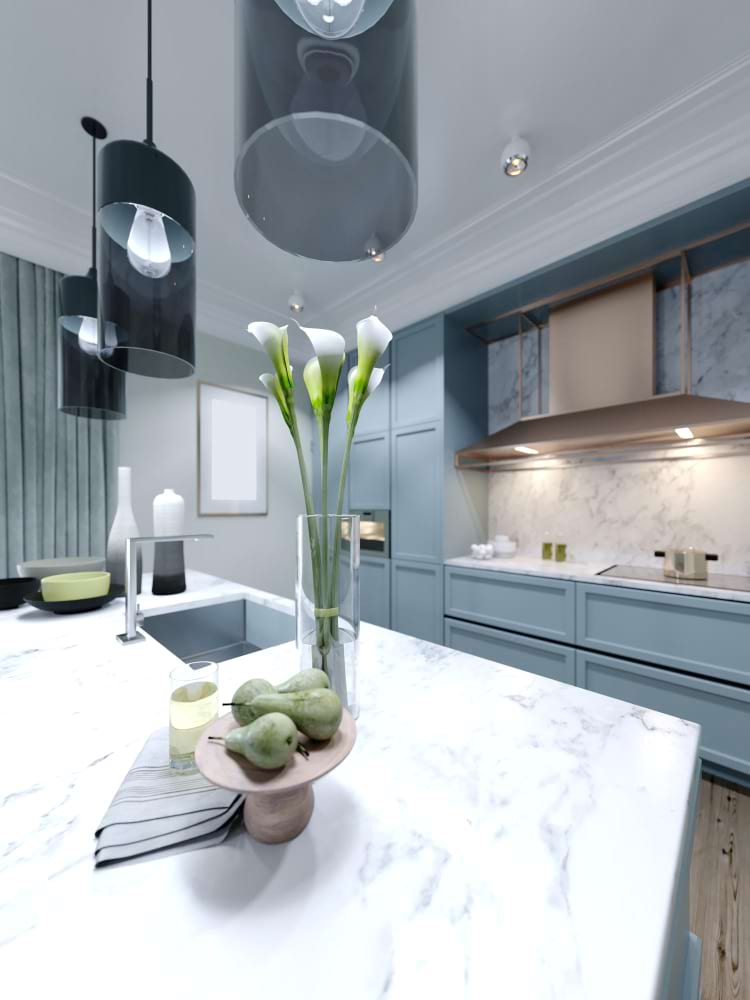
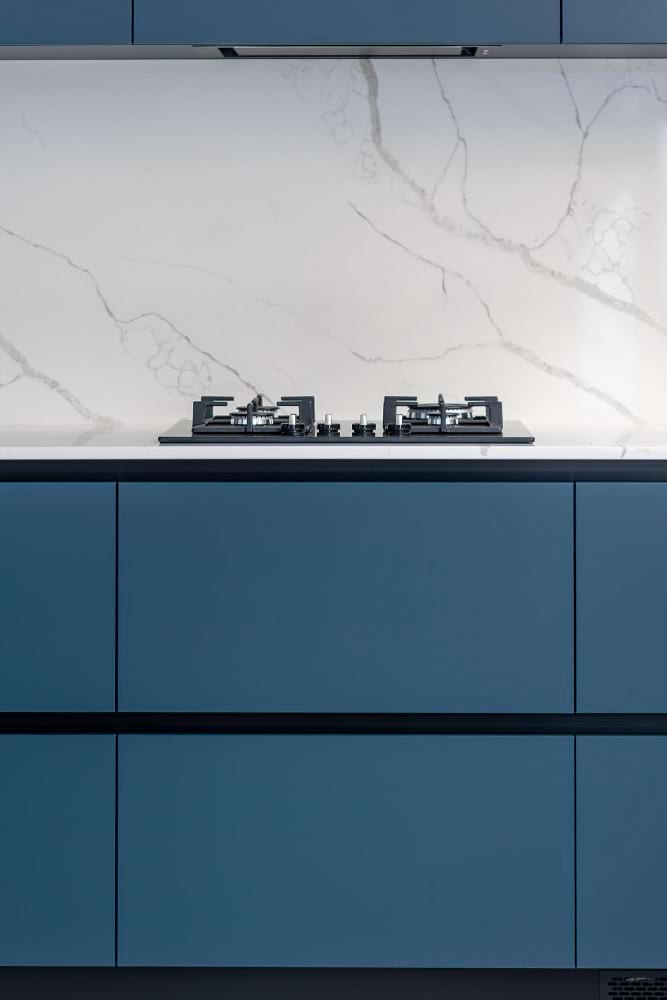
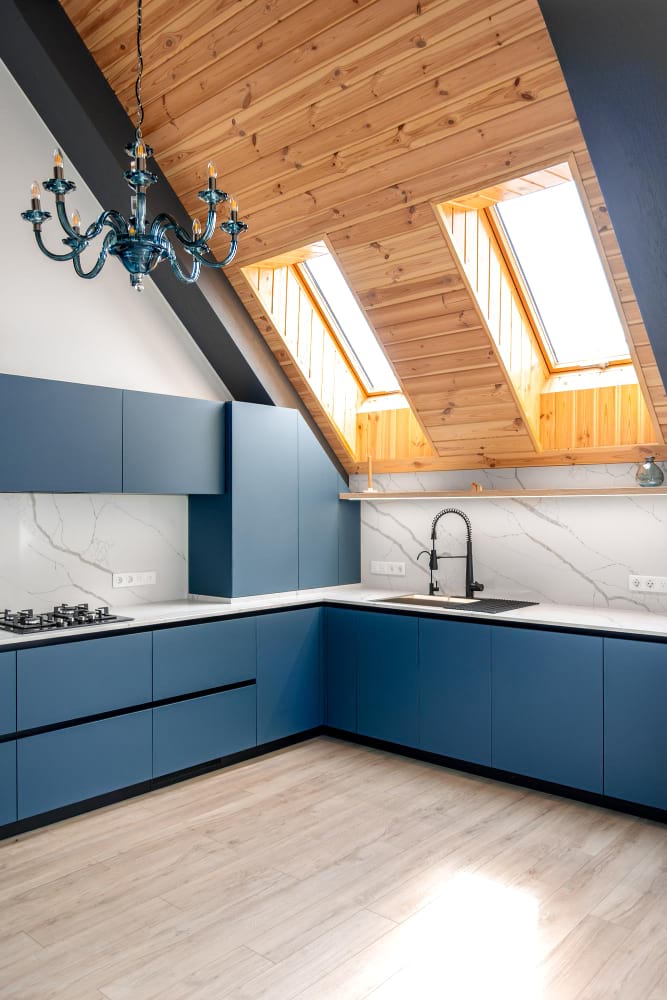
8. Blue Cabinetry with Marble Tops
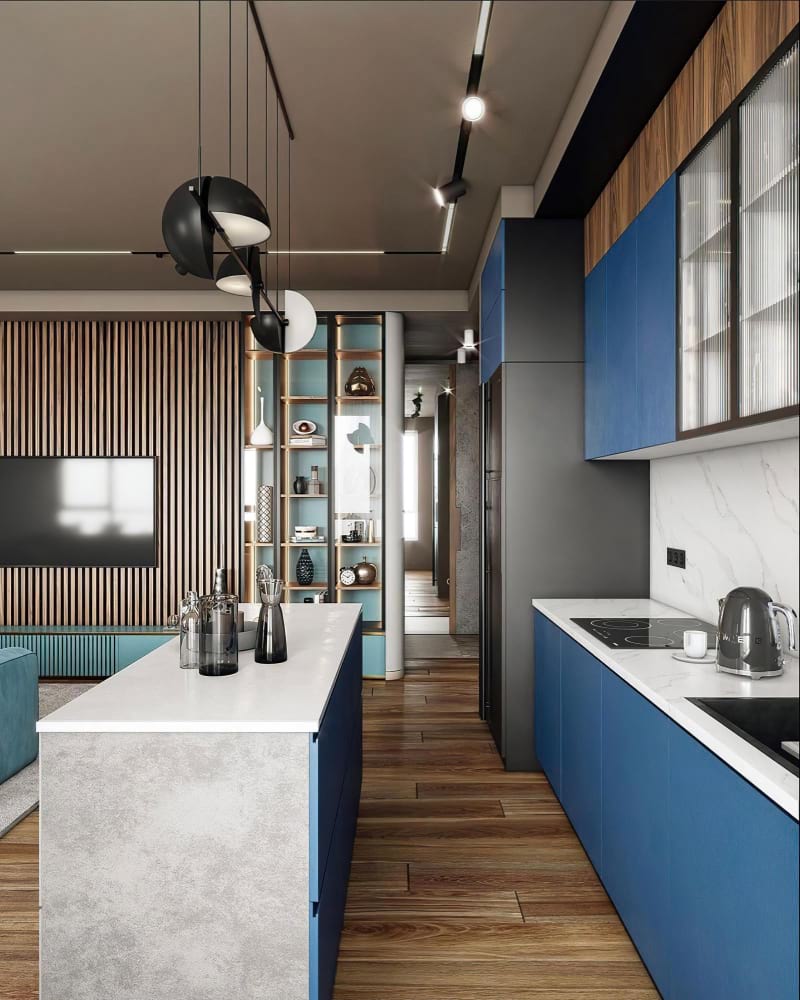
Light marble on the kitchen countertop and island harmonizes perfectly with blue cabinets. The wood-effect flooring adds a natural touch to the composition.
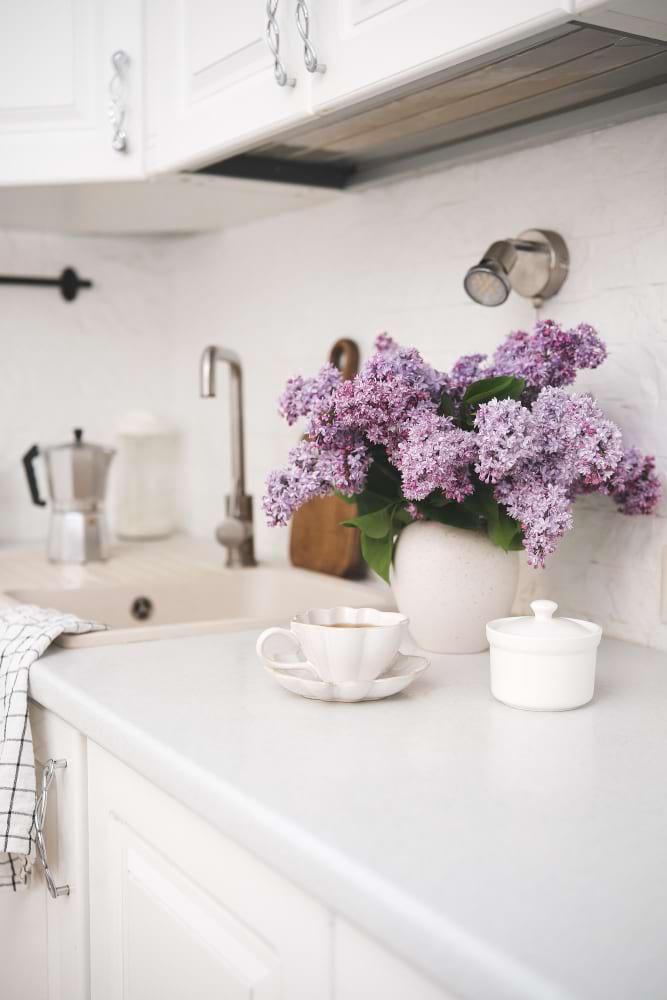
9. Bright White with Wood Accents
White countertops combined with white walls are a perfect way to brighten up the kitchen. Additionally, a wooden worktop or table can be used to add warmth.
10. Grey Stone & Wooden Island

A grey kitchen countertop combined with a wooden surface on the island creates an interesting pairing. The dark floor features a unique lighting accent.
11. Matte Grey & Orange Pop

The matte countertop in a muted grey tone enhances the kitchen’s modern, understated elegance. An orange chair serves as an interesting addition, breaking the monochrome palette.
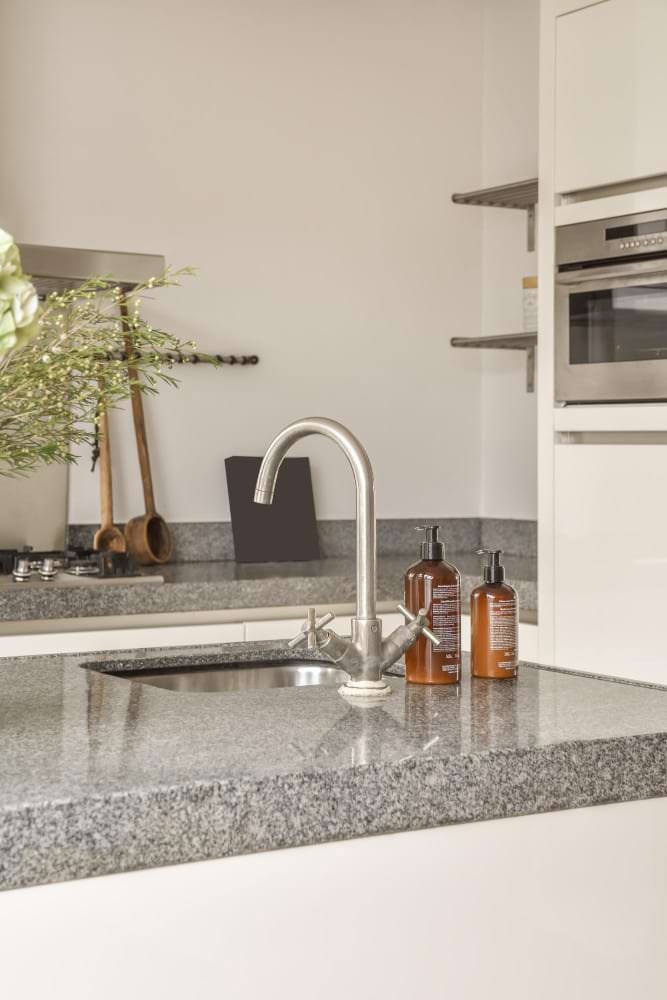
12. Stone Cladding & Black Fixtures
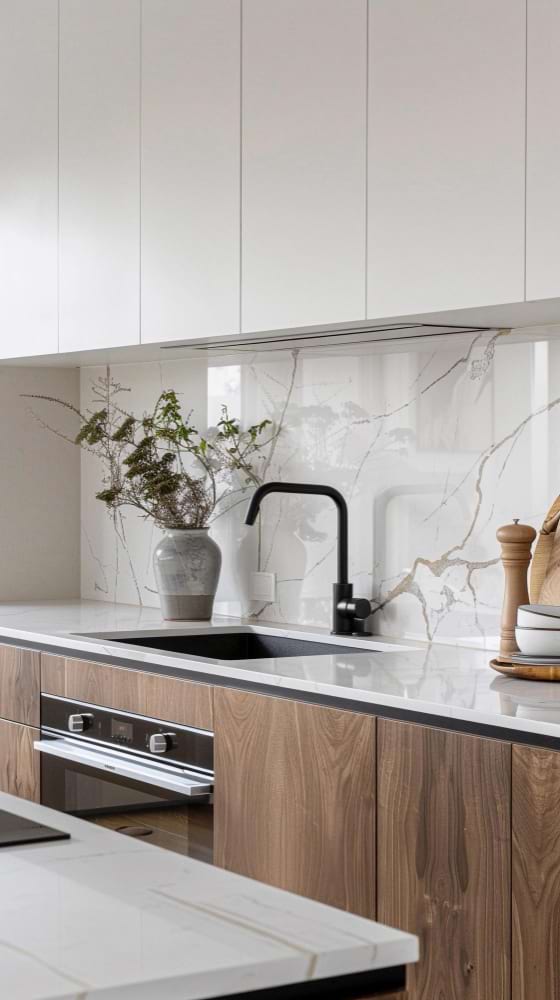
White kitchen slabs match wooden cabinets perfectly, connected by stone cladding between the lower and upper units. A black screen and sink provide a modern accent.
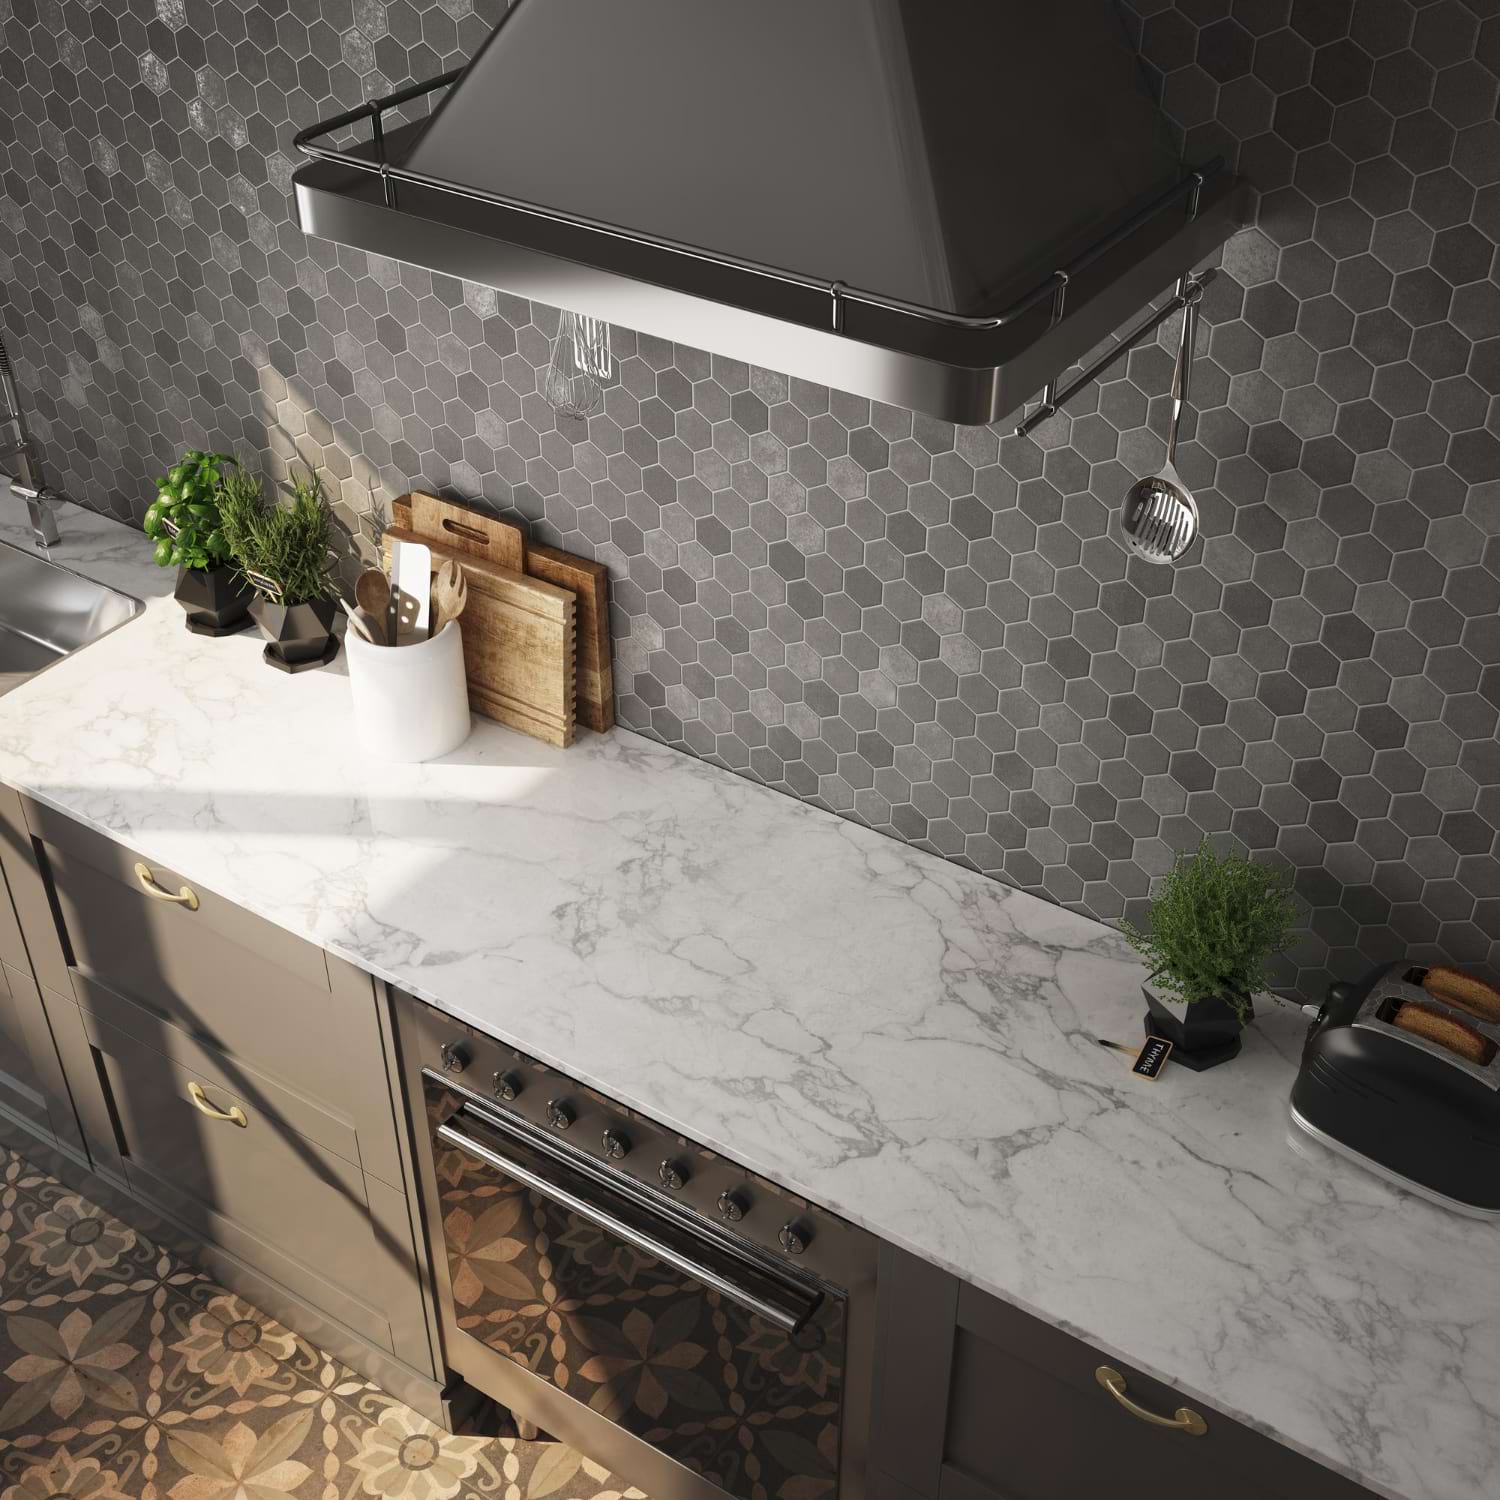
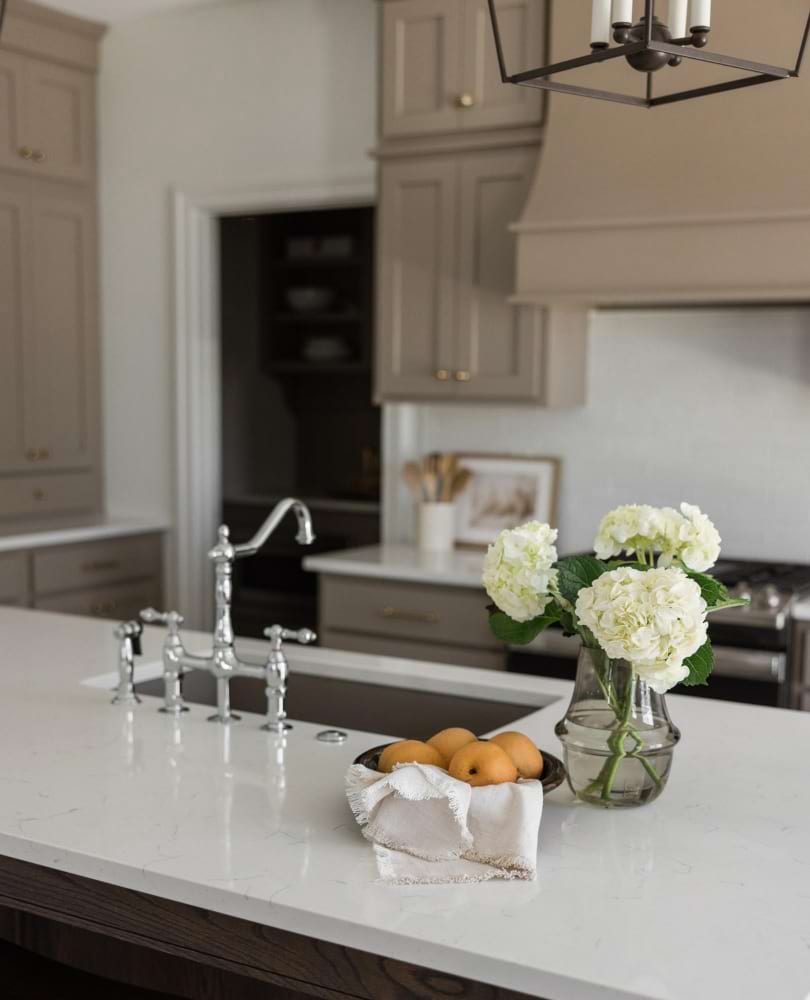
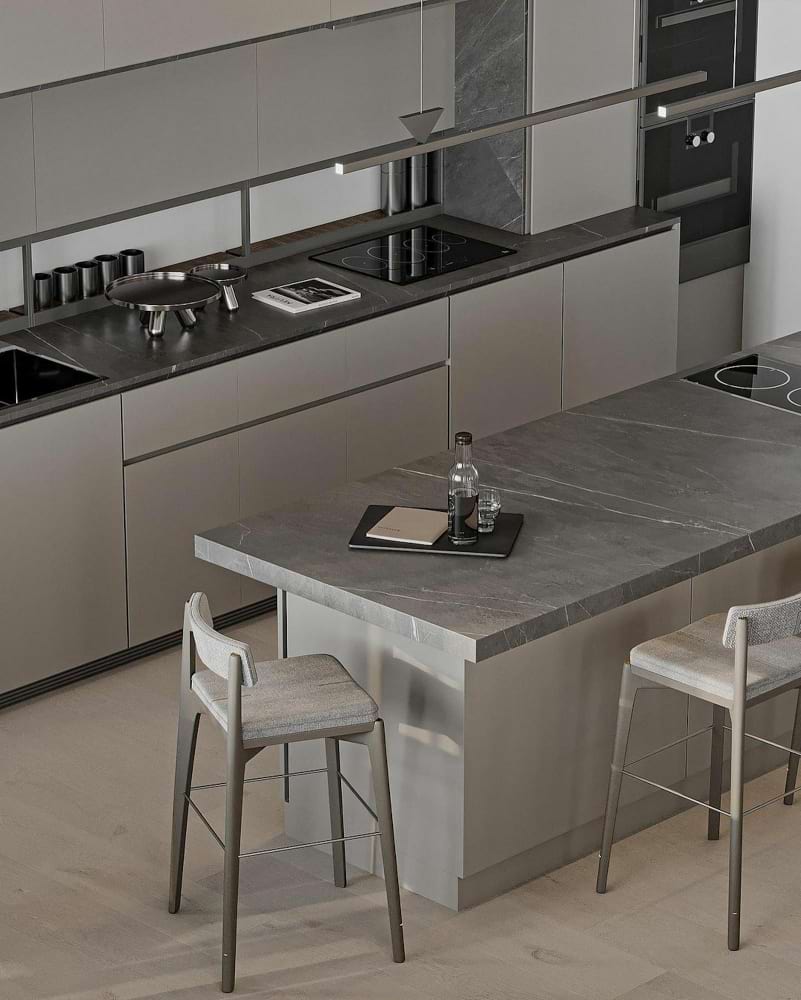
13. Universal White & Grey Stone
A stone countertop in shades of white and grey is a universal idea. It fits perfectly with grey finishes and dark wood cabinetry—a solution that works in any kitchen.
14. Classic Wood & Cream Marble
A classic kitchen featuring a wooden island with a sink and black cabinets. The cream marble is a perfect match, while a classic brass faucet adds style.
15. White Kitchen with Stone Inserts
A bright kitchen with white cabinets is enhanced by grey stone inserts. These subtle additions slightly break the uniformity of the white color.
16. Cozy Beige & Rounded Island
A cozy kitchen in dark beige with wooden accents. The rounded kitchen island features a black faucet and a matching black sink.
17. Modern Blue & Bright Island
A modern bright kitchen where a light countertop on the island meets light blue cabinetry. Modern lamps provide ample light over the workspace.
18. Creamy Pastels & Wood

The bright marble countertop brings lightness and elegance. Cream shades, wooden cabinets, wood-effect flooring, and pastel colors create a very cozy kitchen.
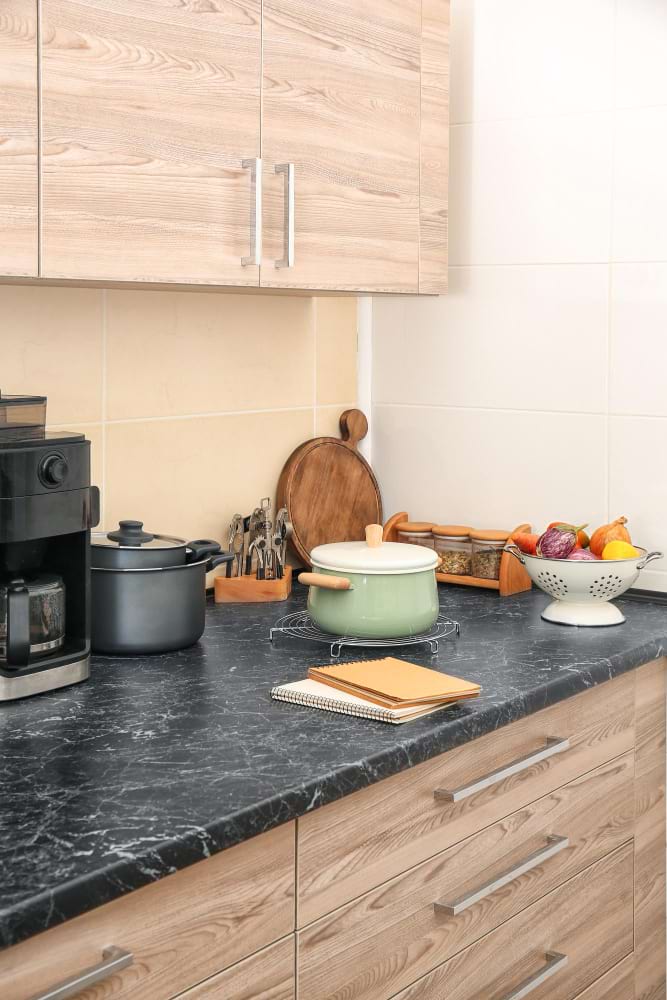
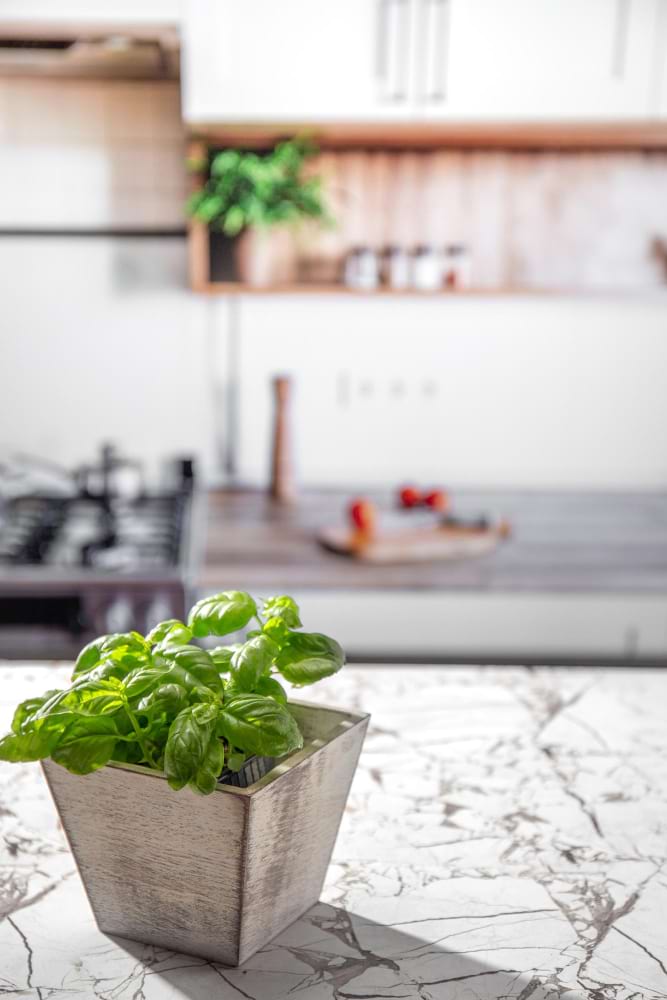
19. Soft Marble & Wooden Accessories
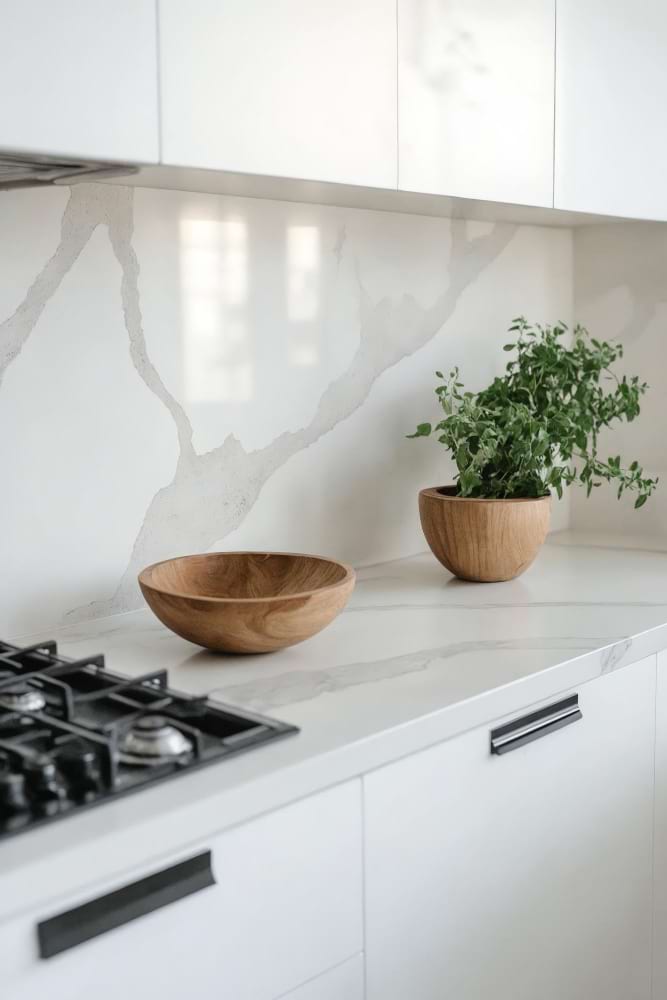
The elegant marble-look countertop introduces softness. In a bright kitchen, wooden accessories like a pot or bowl add a warm, natural touch.
20. Vintage Style with Delicate Veining
The smooth, light-toned countertop with delicate veining creates a clean backdrop. Paired with cream cabinets and a 1920s-styled faucet, it makes a stunning impression.
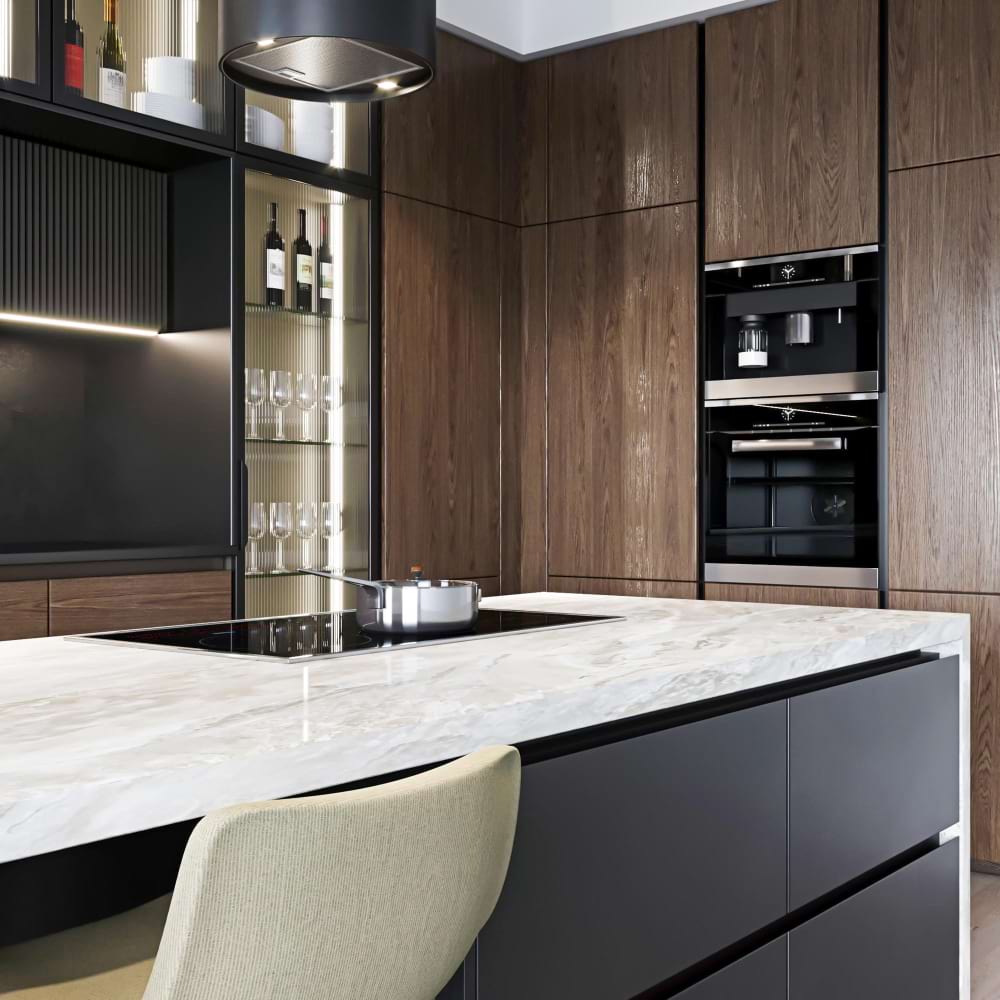
21. Darker Tones & Metal Handles
A kitchen in darker shades featuring a very interesting countertop structure on the island. This is combined with grey cabinets and metal handles.
22. Pastels & Marble Walls
A kitchen in pastel shades featuring light marble slabs on both the walls and the island. The color scheme is highlighted by perfectly selected accessories.
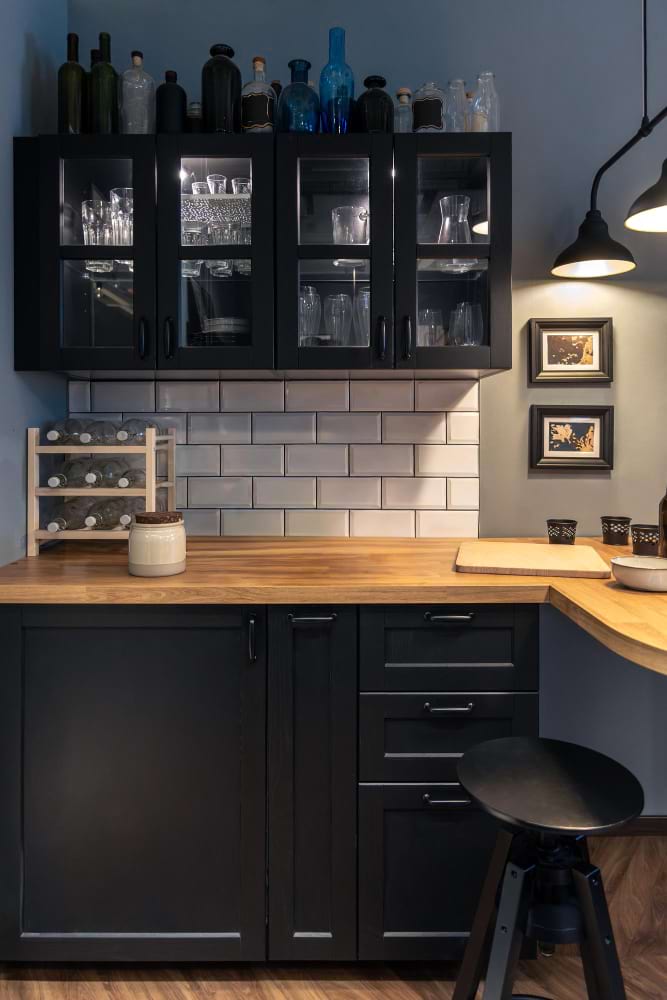
23. Dark Stone & Wooden Drawers

An interesting combination of dark stone countertops with wooden cabinets and drawers. Black tiles on the wall between cabinets offer a great solution for classic style lovers.
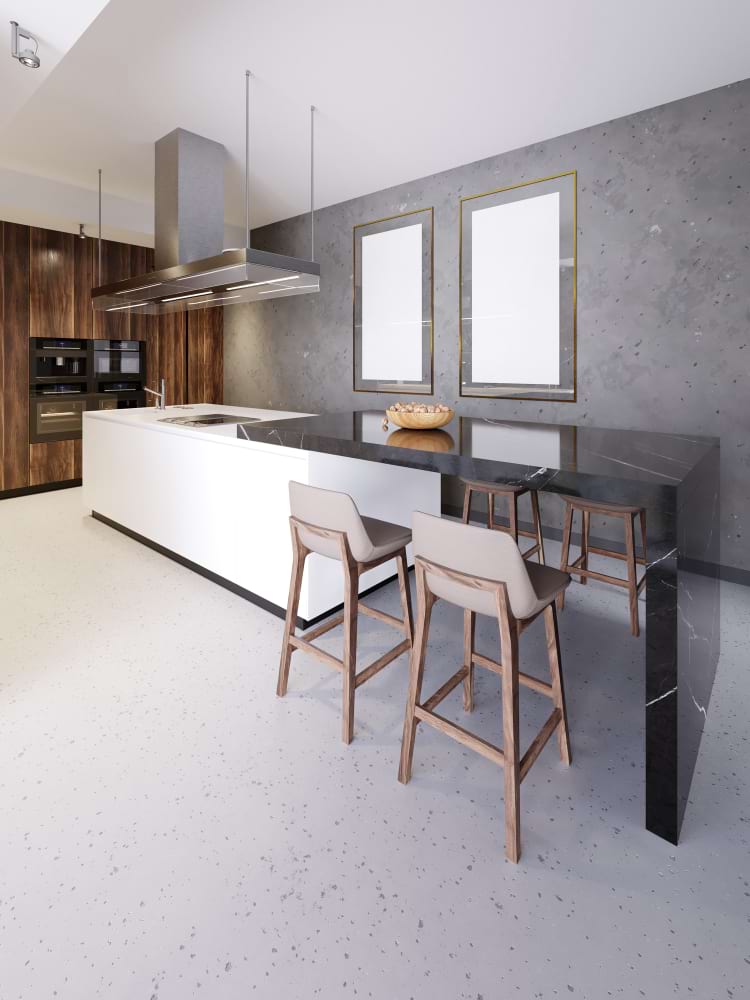
24. Black Marble Table & White Island
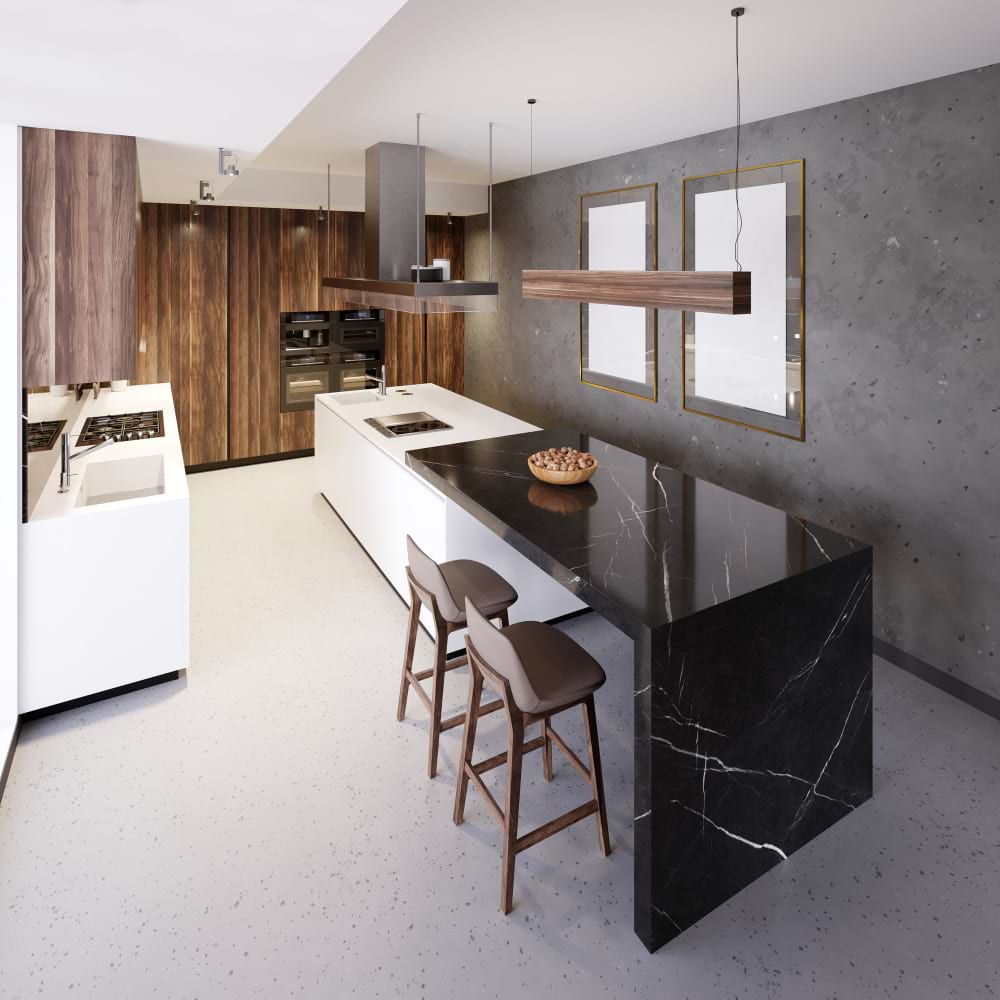
A fascinating combination of a white countertop on the island and a black marble table. Paired with wooden cabinets and a grey wall, it creates a great color mix.
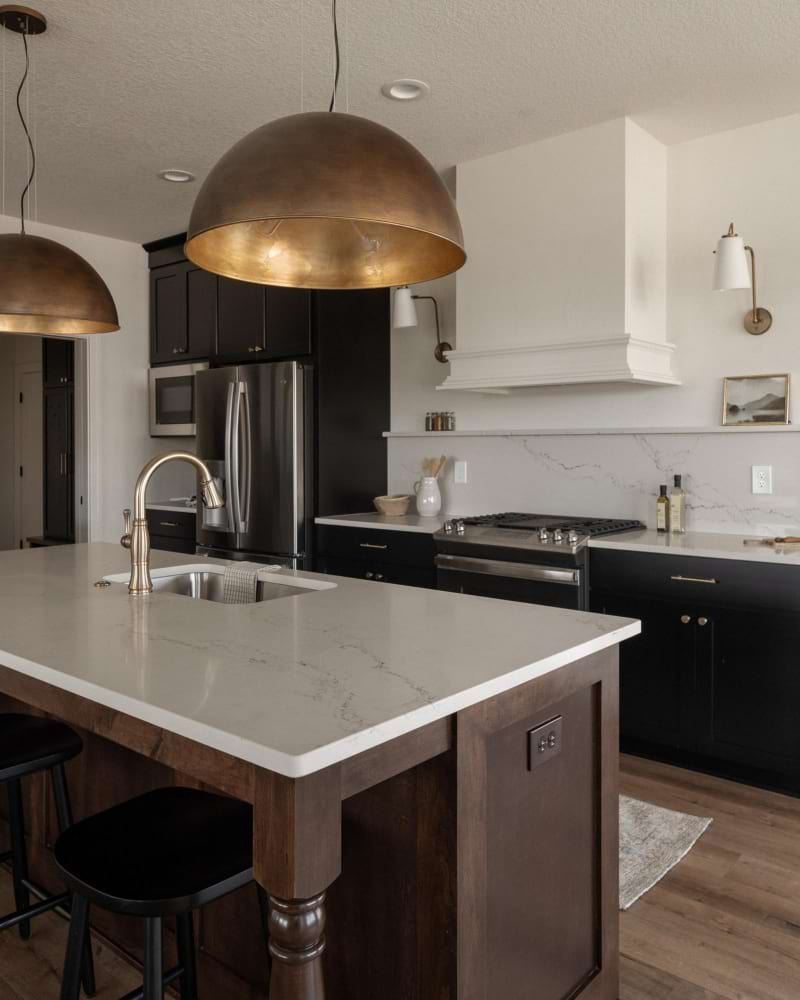
25. Grey Granite & Modern Lighting
A kitchen island in dark grey granite, connected to a modern wood-look table. Dark grey cabinets mixed with white units, wooden elements, and interesting lighting create an aesthetic modern kitchen.
26. White Top & Ceiling Beams
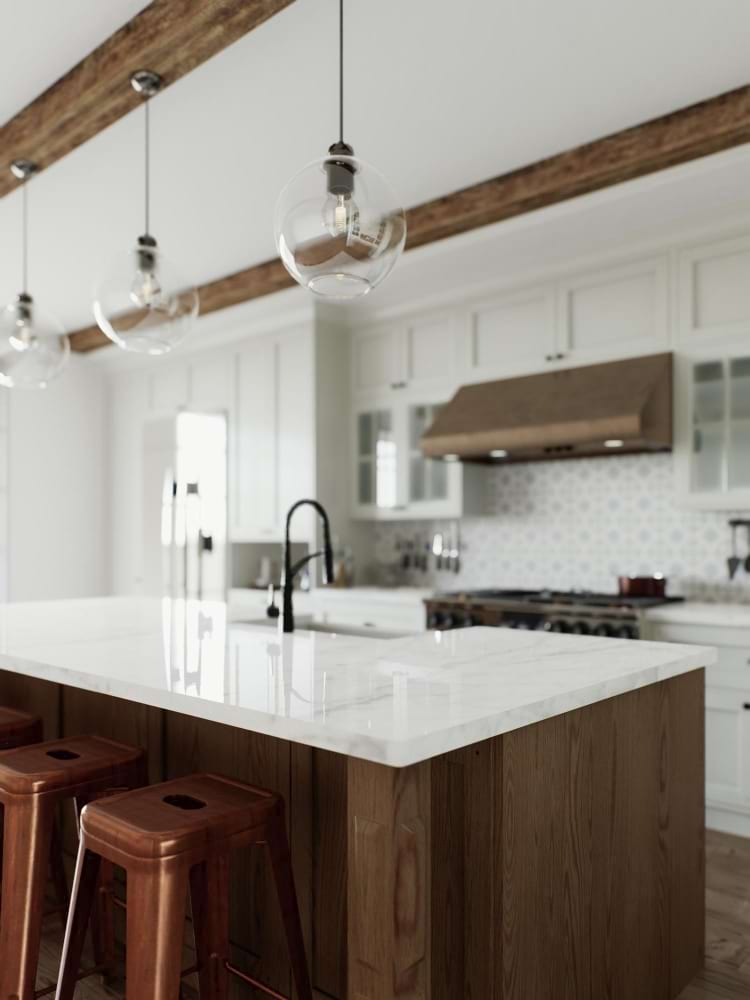
A white countertop on the kitchen island is a classic choice. Combined with wood, bright walls, a wooden ceiling beam, and modern lighting, it creates a unique arrangement.
27. Early 20th Century Style

A stylish kitchen nodding to early 20th-century design. The countertop is clad in wood-effect panels, paired with dark stools, white cabinets, and metallic appliances. Hanging lamps add charm.
28. Muted Browns & Central Island
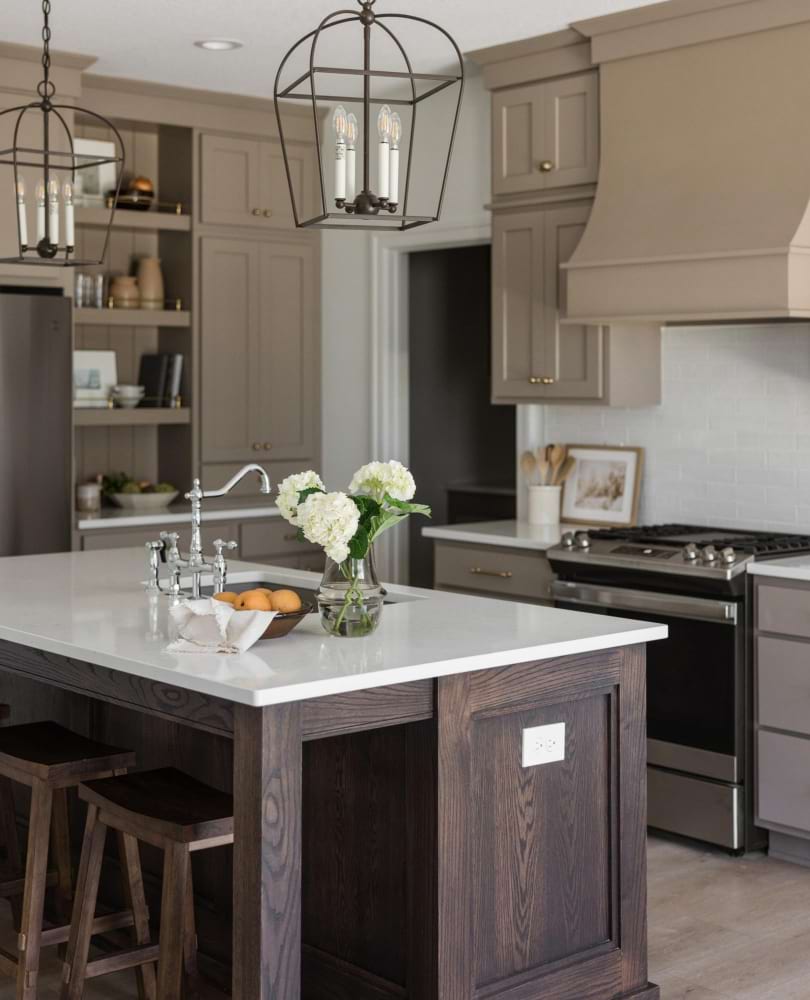
A beautiful classic kitchen for those who love muted colors. Cabinets in light brown tending towards beige surround a central island with a white top and wooden sides.
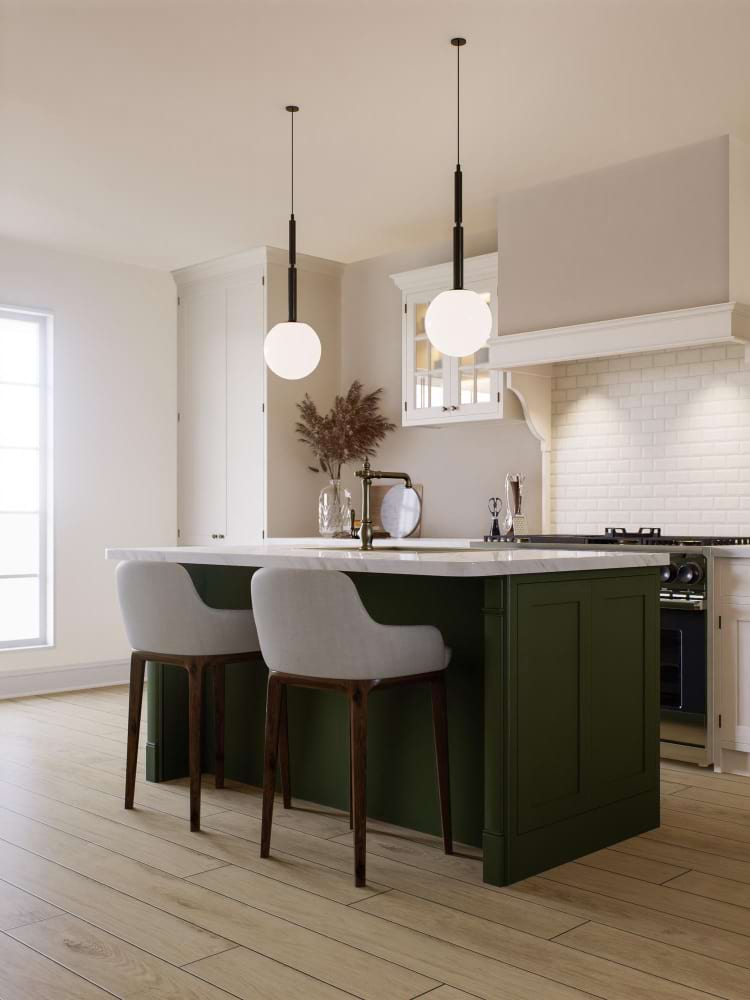
29. Green Island & White Marble
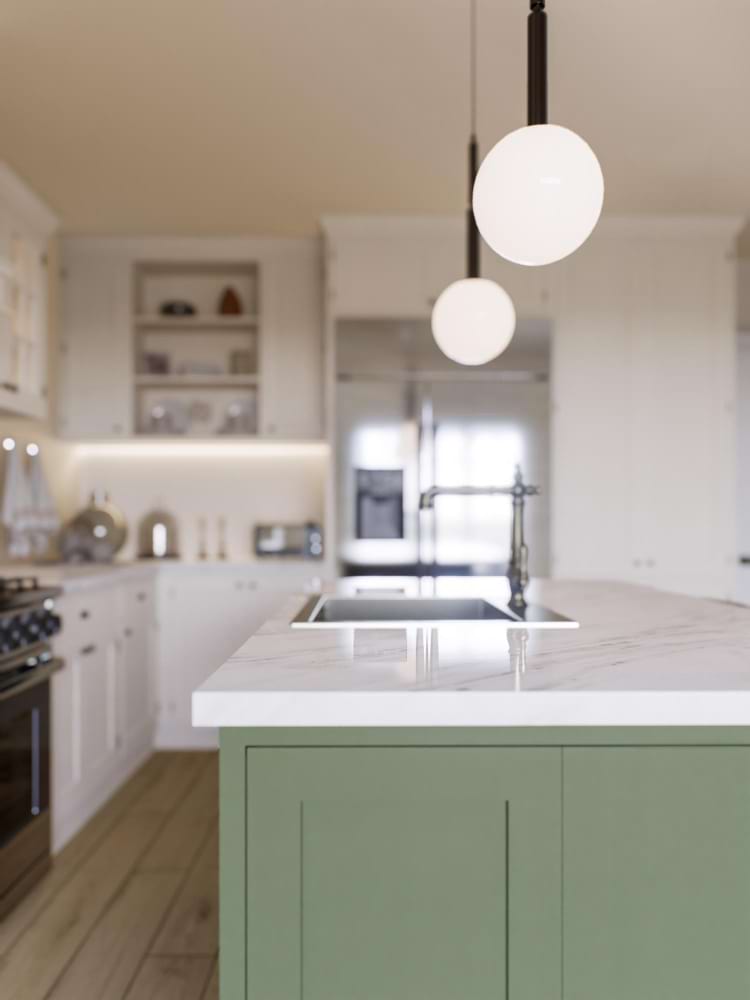
An elegant white kitchen featuring a central island with a classic white marble top, light metal faucet, and green sides. Wood-effect flooring completes this popular style.
30. Navy Blue & Gold Contrast
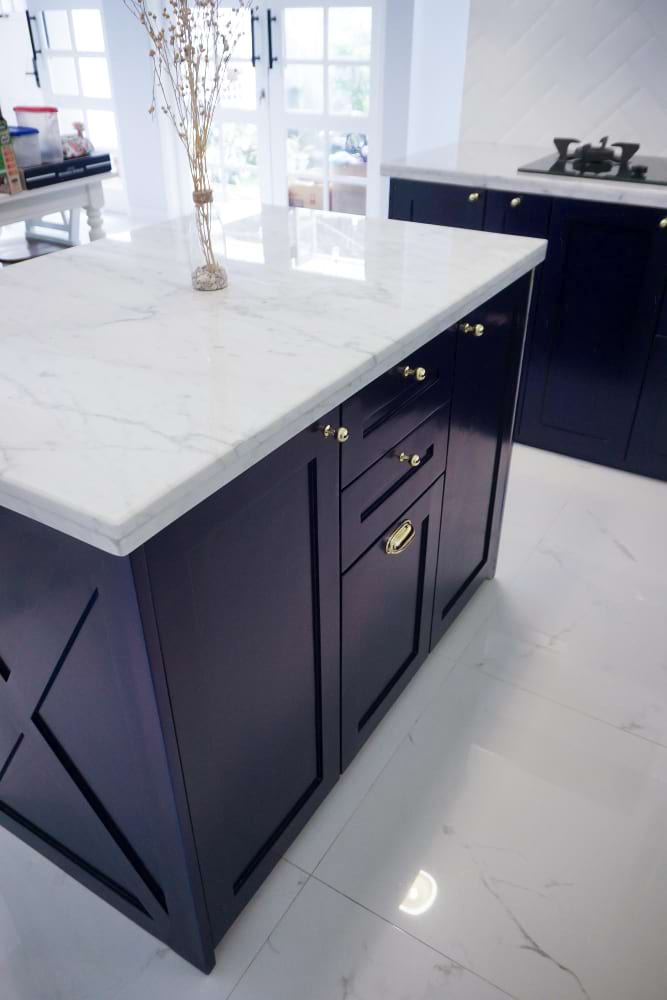
A very elegant, slightly minimalist kitchen. The white countertop on the central island contrasts sharply with dark navy cabinets featuring gold handles.
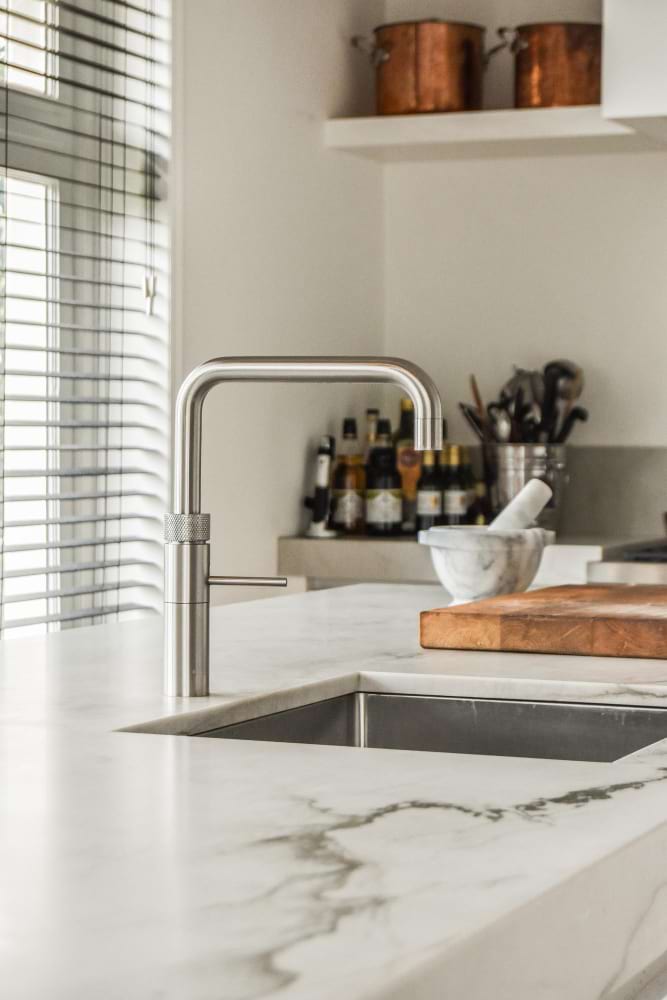
31. White Marble Floor & Countertop
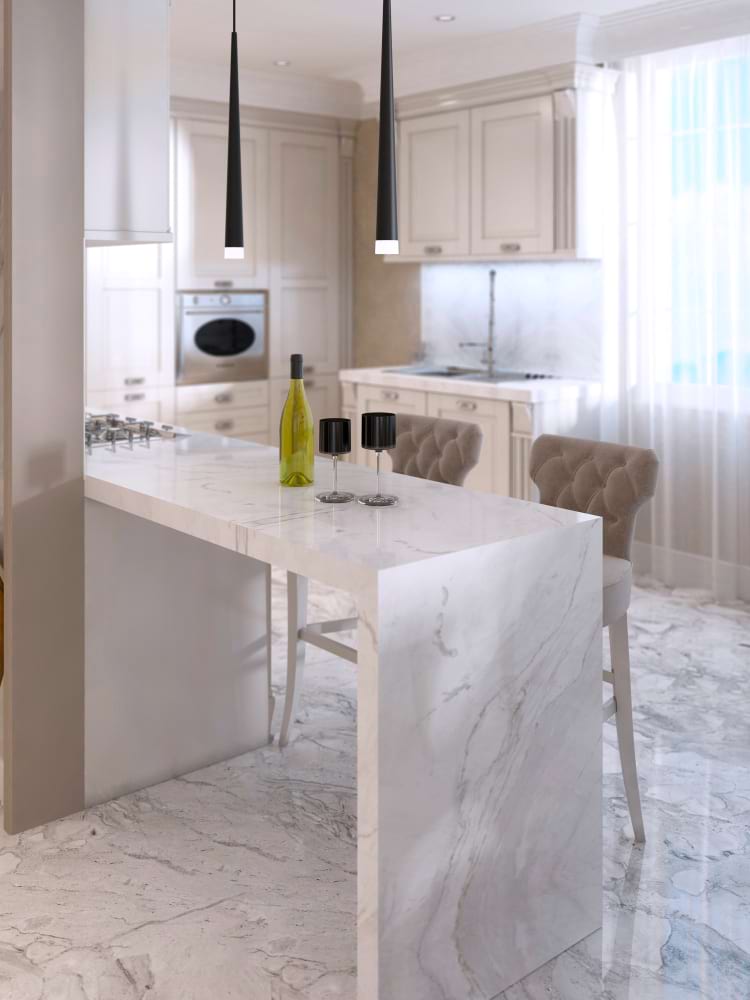
White marble is a solution not just for countertops but also for floors, making the kitchen bright. Paired with white or cream cabinets, it creates a stunning effect, especially with dark cream accessories.
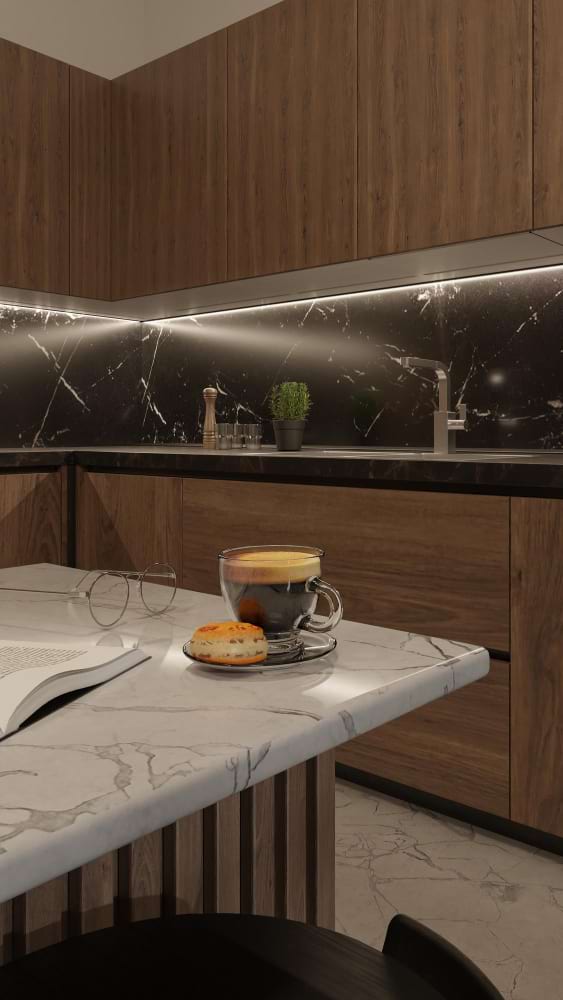
32. Deep Green & White Elegance
Elegance, simplicity, and class. An island with a white marble top is finished in dark green on the sides. White cabinets, interesting built-in oven units, and light wood-effect flooring complete the look.
33. Blue & White with Industrial Hood
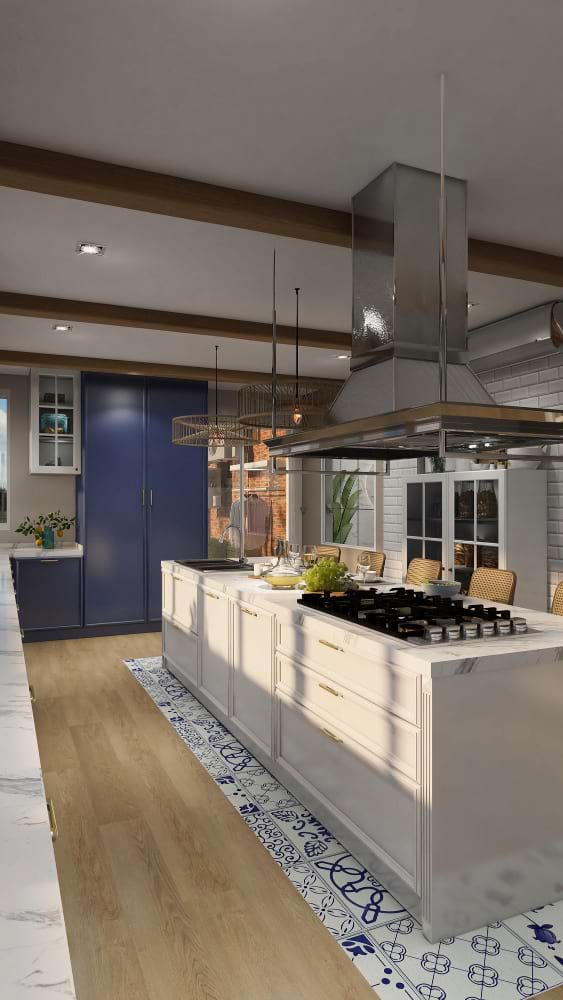
A large bright kitchen with a long countertop and an industrial hood over the burners. Some furniture is white, while other cabinets are blue, creating a balanced, non-intrusive color scheme.
34. Bright Stone & Metal Faucet
A light stone countertop brings freshness and elegance, reflecting natural light. An interesting combination with wooden cabinets, a classic white sink, and a metallic faucet creates a recipe for a bright kitchen.
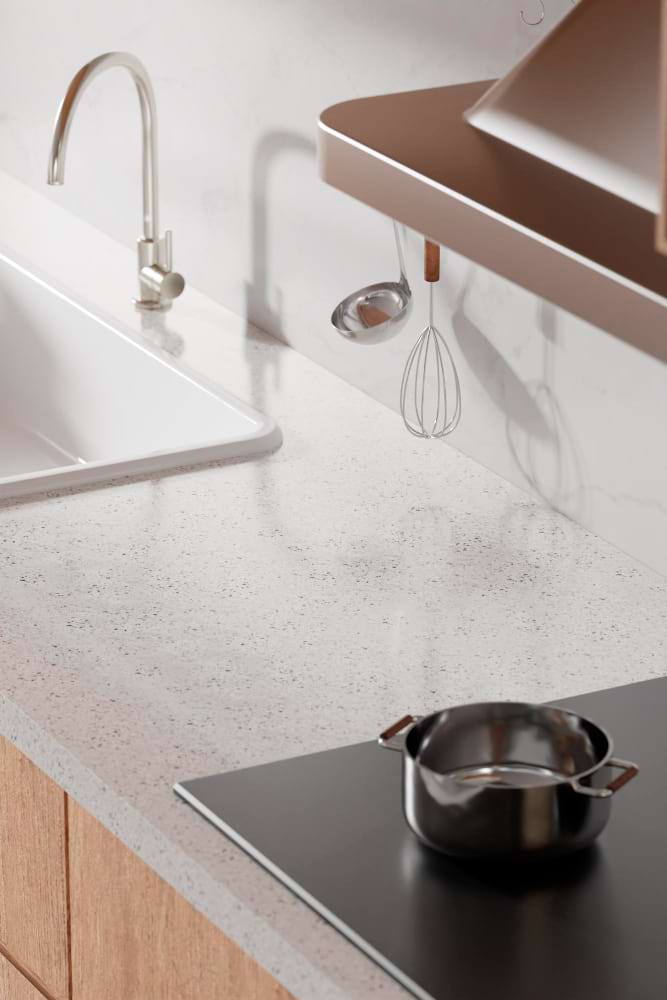
35. Classic Wood & Induction
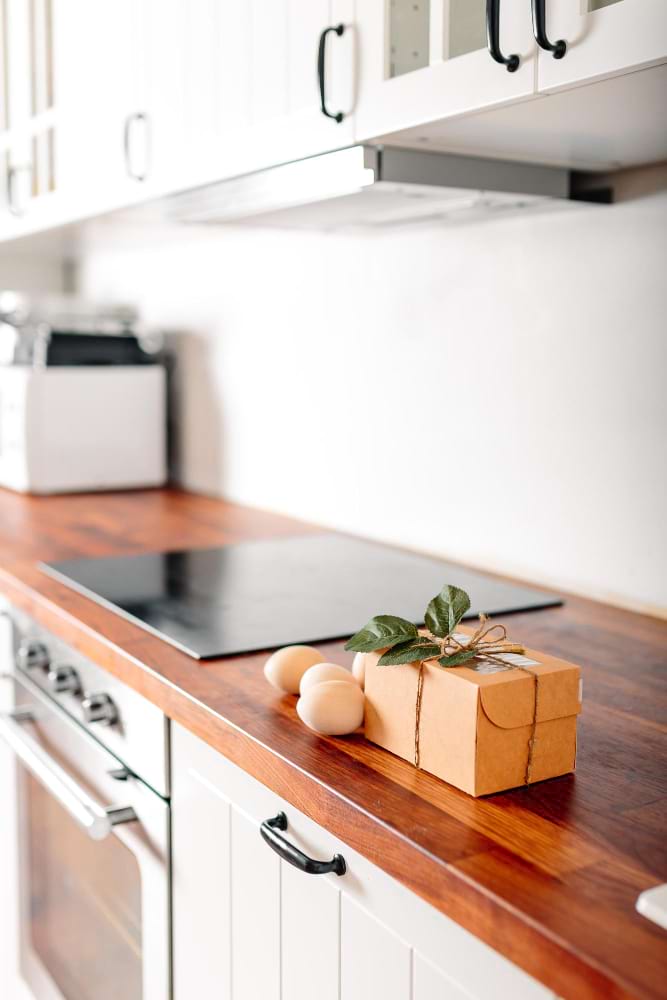
A wooden or wood-effect countertop in a classic style combined with a modern induction cooktop. White classic cabinets with black handles create a cozy solution.
36. Grey Wood & Brass Sink
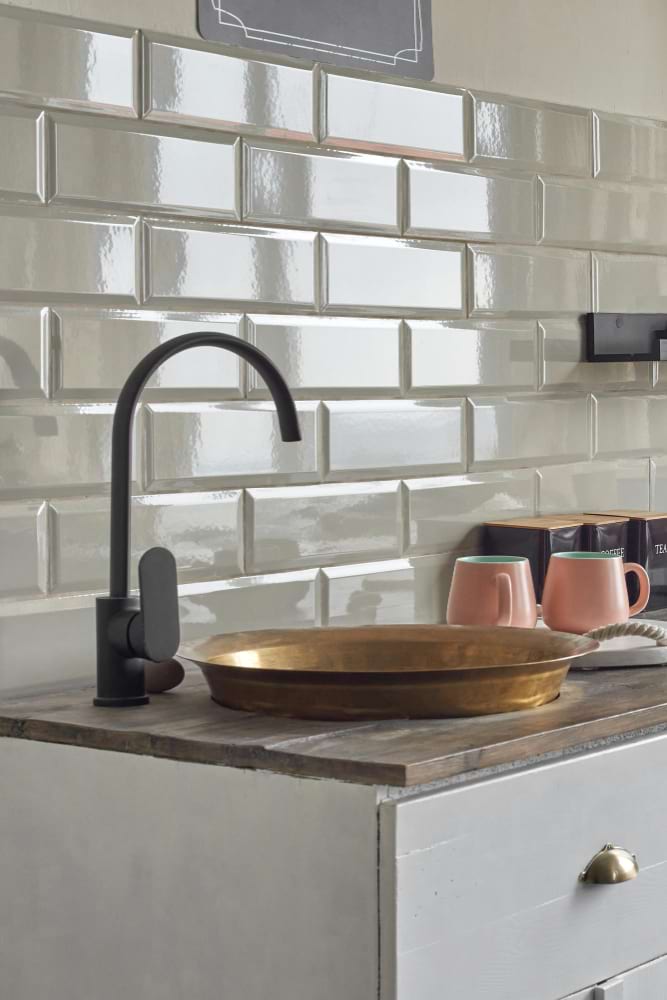
A classic wooden countertop in a grey shade, combined with glossy wall tiles and a classic brass sink. An interesting inspiration for those seeking traditional style.
37. Green Tiles & Cream Cabinets
A dark countertop on the island and cream cabinets contrast interestingly with green wall tiles. A large white sink completes this unique pastel arrangement.
38. Marble Walls & Blue Cabinets
Beautiful simplicity and class. A white marble countertop with characteristic veins matches the marble-clad walls. This setup harmonizes perfectly with blue cabinets and a modern gas cooktop.
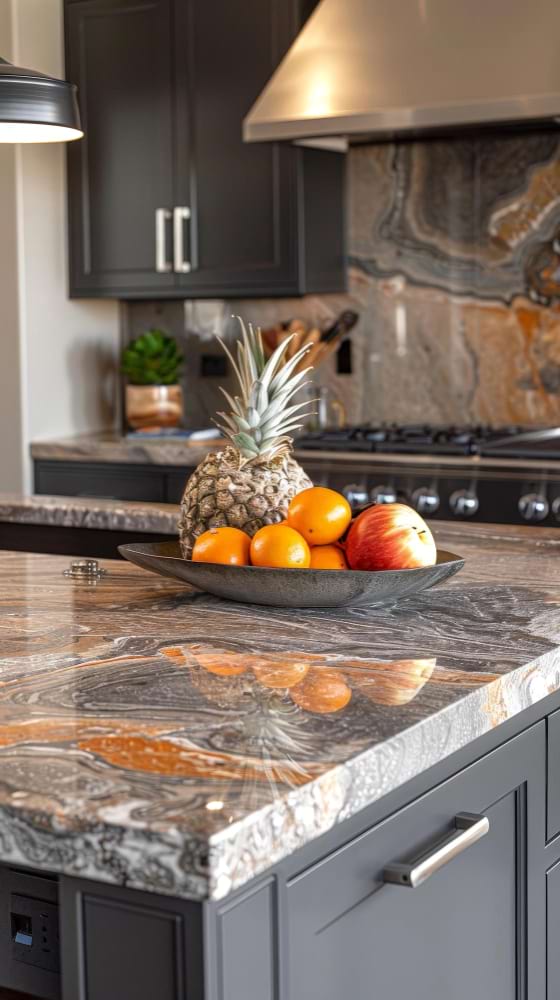
39. Dark Granite Universal Look
A dark granite or marble countertop is a universal solution. Combined with cream wall tiles and wooden cabinets, it works well in many kitchen designs.
40. Scandinavian Minimalism
An interesting combination of white marble and cream shades. With a modern hood and induction cooktop, this Scandinavian style invites vibrant accessories to add contrast.
41. Dark Island & Black Fixtures
A very dark island countertop combined with a black faucet and sink is beautiful classic. Wooden cabinets and white walls create interesting contrasts despite the strong color differences.
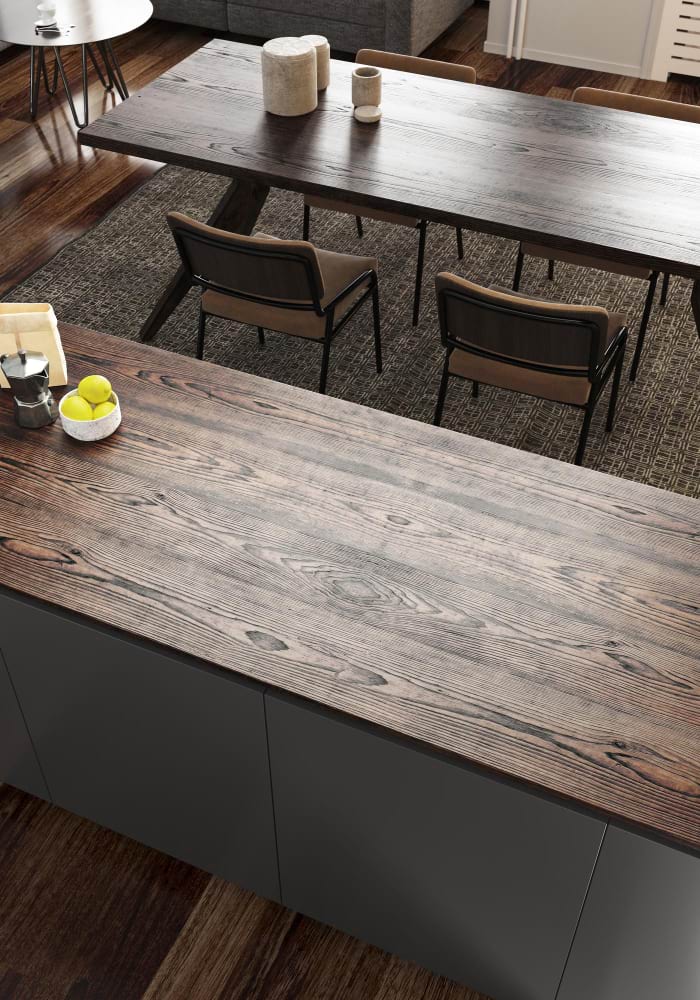
42. Massive Wood Island Top
A thick, massive wooden island countertop with visible grain creates a striking look. Combined with dark cabinets, it’s an interesting idea for those seeking a unique kitchen.
43. Patterned Marble & Wood Floor
For minimalism lovers, this design dominates with light marble featuring a natural pattern. The floor is partly white and partly light wood, creating a very aesthetic Scandinavian look.
44. Dark Countertop & Cream Walls
Cream walls and cabinets combined with a dark countertop offer a great visual solution. A metal faucet and light sink provide a base for adding accessories in other colors.
45. Light Marble & Gold Trays
An idea for using light marble on countertops and walls, paired with light floors. In the background, pastel walls and interesting accessories like a gold tray complete the look.
46. Beige Tones & Metal Handles
Dominant beige colors and a white induction cooktop create a style that is both classic and modern. The drawer handles feature an interesting metallic finish.
47. Beige & Wood Round Table
Beige can be a very interesting solution. A light countertop combined with wood-effect flooring and an interesting round table with chairs creates a warm atmosphere.
48. Cherry Wood & White Cabinets
A wooden countertop in a reddish cherry shade provides an interesting contrast to white cabinets and walls. Nearby, a dark induction cooktop and white sink complete the color scheme.
49. Marble Cladding & Cream Cabinets

An interesting combination of light marble with bright cream cabinets. The wall also features marble cladding, creating a definitely classic style suitable for many homes.
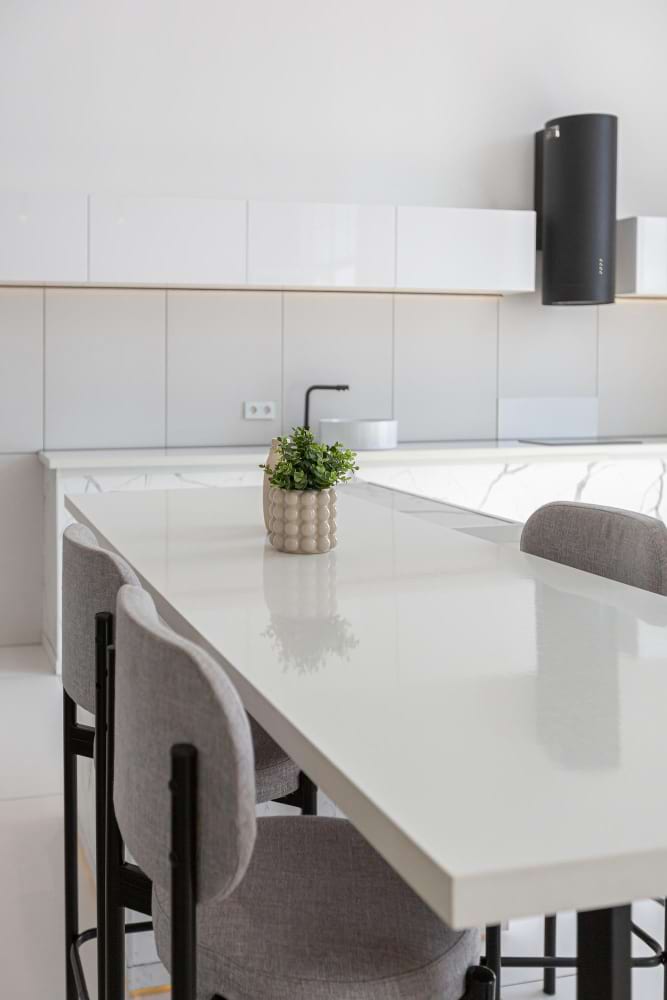
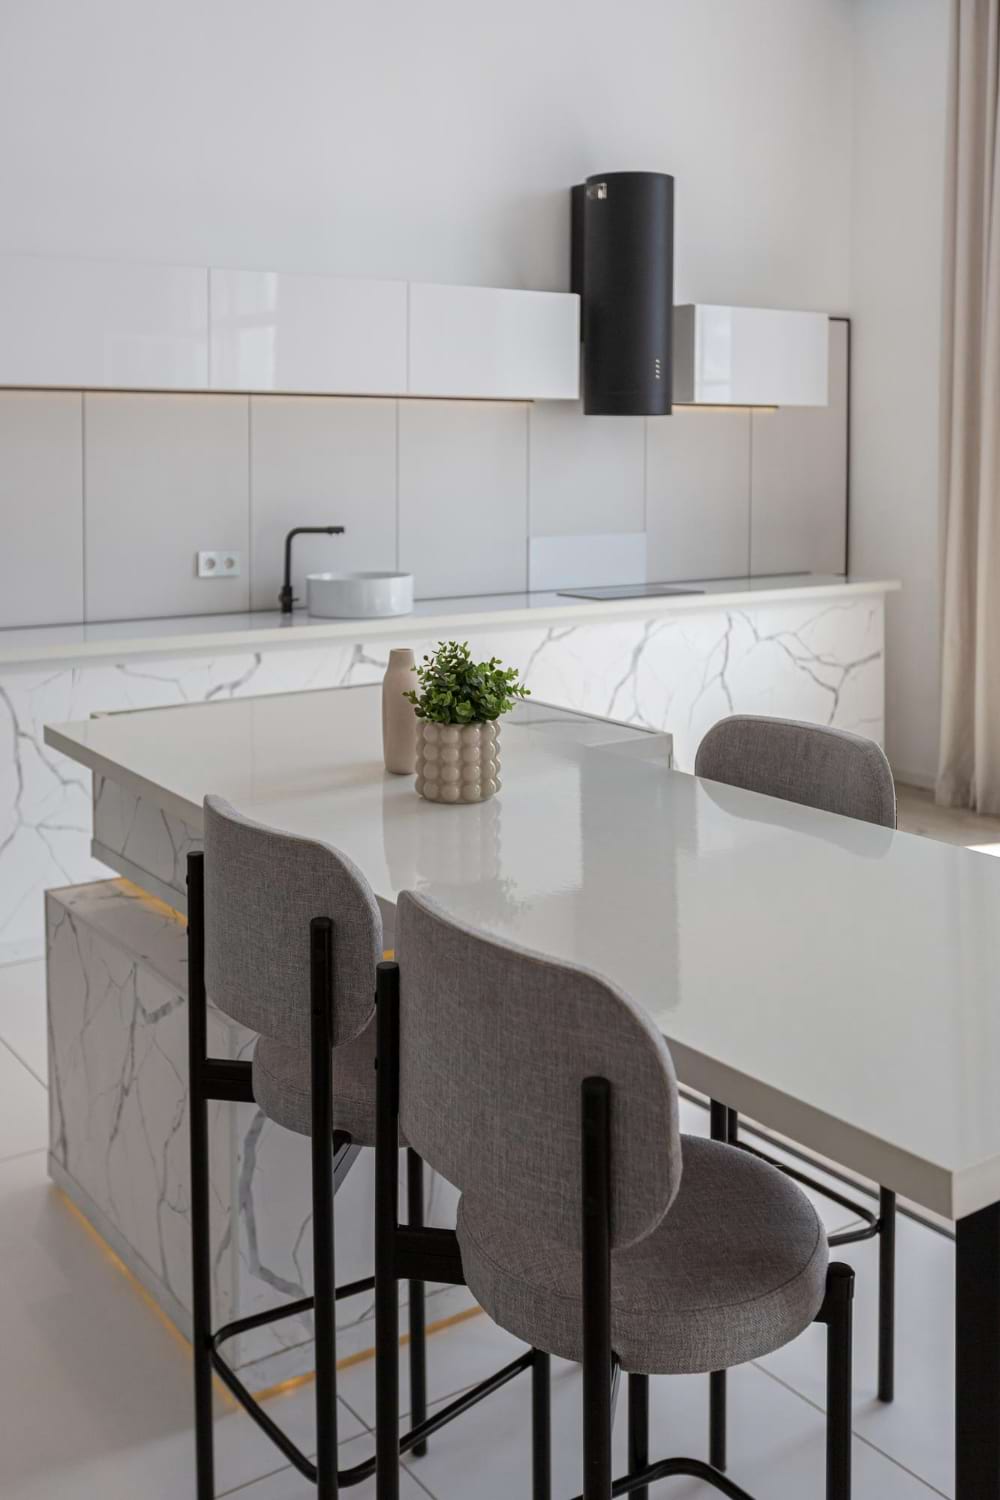
50. Handle-less White Modernity
A spacious, bright kitchen with an island. White handle-less cabinets look very modern, while accessories like the lamp add elegance to this minimalist space.
51. Fresh Herbs & White Cabinets

A wooden countertop paired with modern handle-less white cabinets and a black induction cooktop. White pots with fresh herbs are always a useful and beautiful addition.
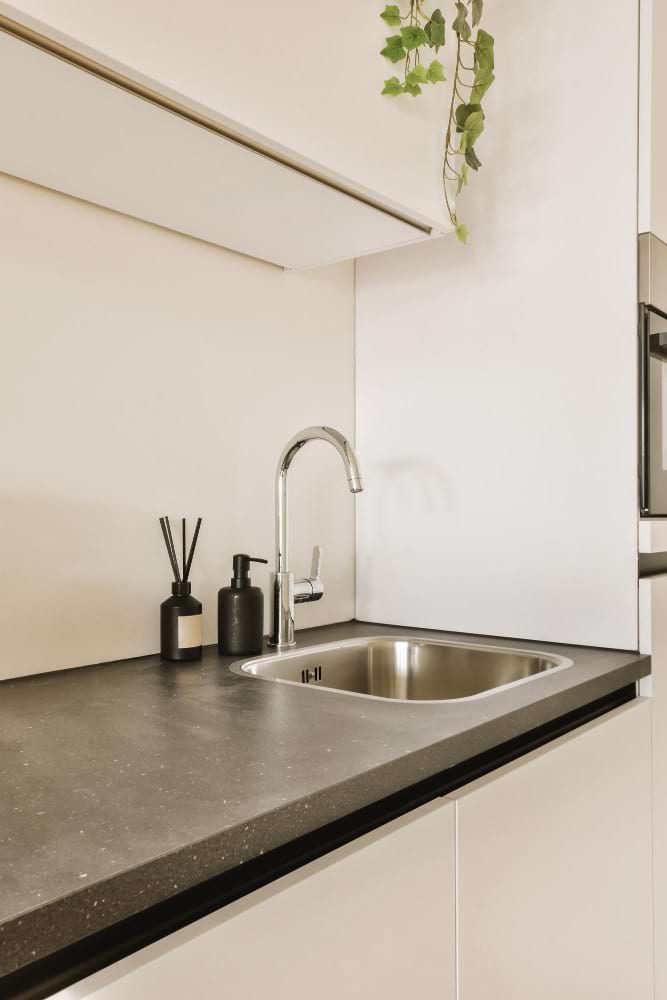
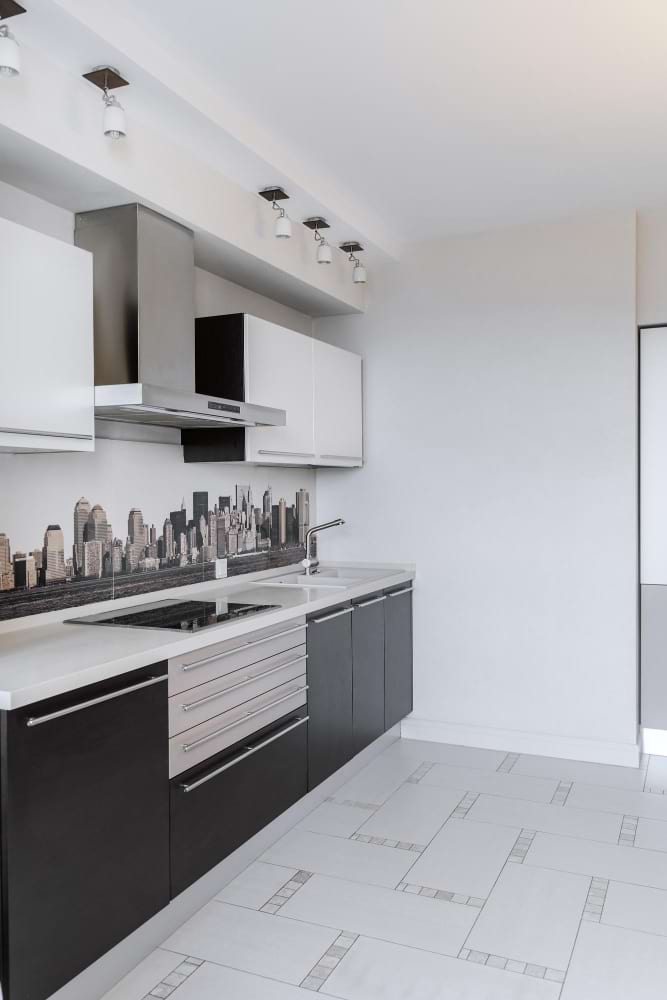
52. Dark Top & Cream Walls
An interesting combination of a dark countertop with bright, cream walls and kitchen cabinets. This creates a clean and grounded aesthetic.
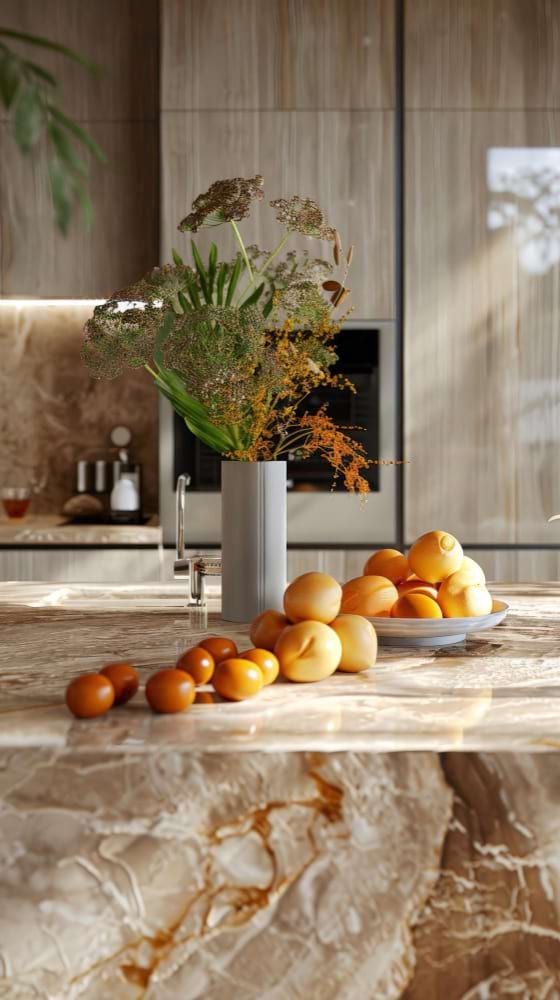
53. Red-Toned Dark Marble
Beautiful marble colors: dark stone with red hints as the countertop, and grey marble on the wall, paired with a classic wall oven.
54. Multi-Colored Marble & Wood

Another example of dark marble showcasing various colors like light grey and red. Combined with wooden cabinets and a metal wall oven, it gives a very interesting effect.
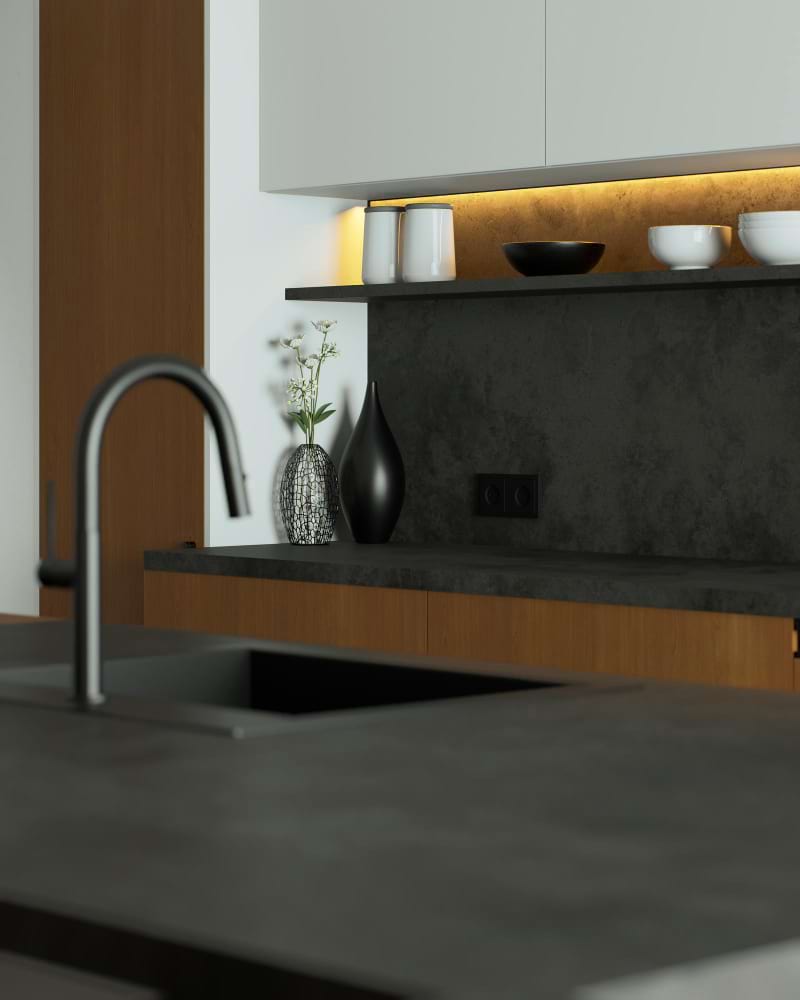
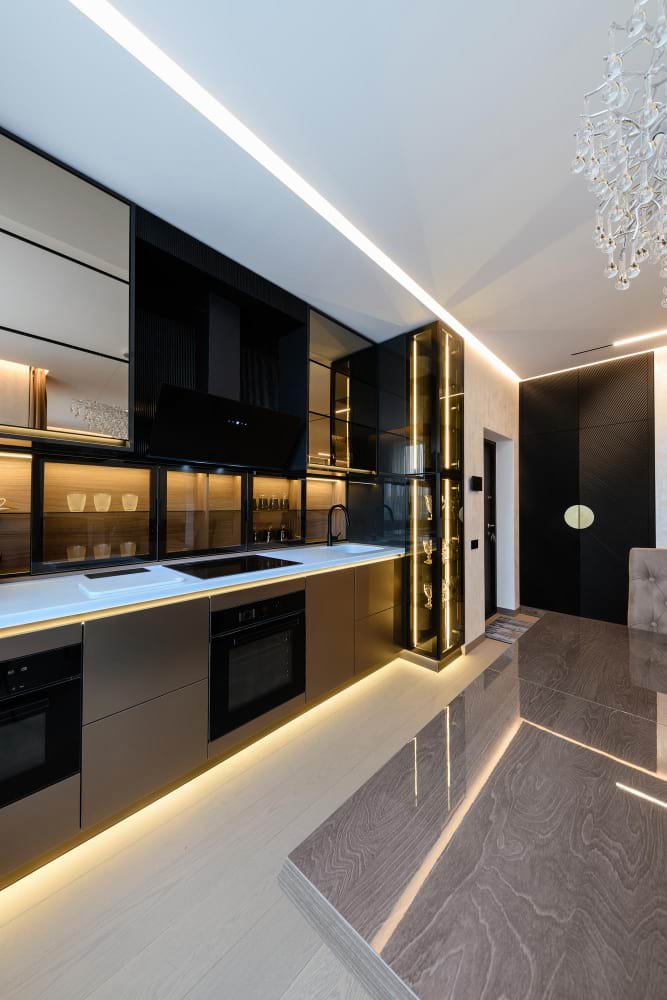
55. Lighting Dark Stone
Dark stone countertops are worth illuminating with spot lighting. Here, light reflects off the metal range hood, and under-cabinet lighting enhances the ambiance.
56. Industrial Black & White Veins
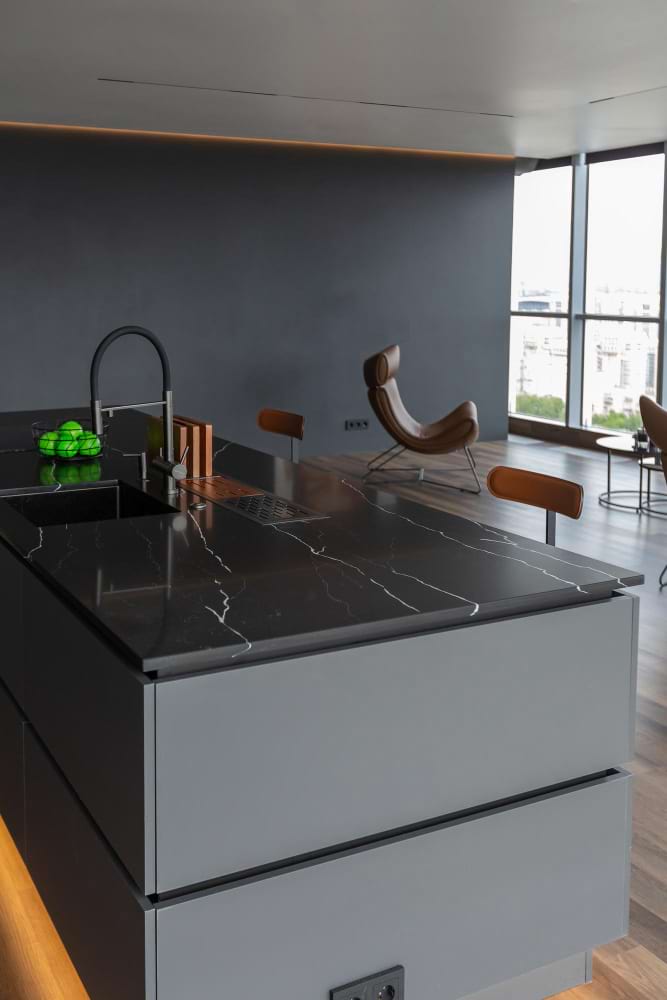
A very interesting industrial minimalist style. The island slab is black with white veins, matching the grey walls and dark floor—perfect for those seeking unconventional ideas.
57. Wood & Black Stone Cladding

Another black countertop with characteristic white veins typical of natural stone. Here, the walls are also clad in slabs, harmonizing well with dark wooden cabinets.
58. Aesthetic Grey Modernity
Aesthetic grey countertops and handle-less grey cabinets define this very modern style. Black appliances like the range hood, microwave, and wall oven complete the look.
59. Black & White Contrast
Combining white and black countertops with a grey floor and wall is a very interesting idea. Wooden cabinets and metal accessories like the vent hood add to the design.
60. Two-Tone Cabinets & Marble Wall

This view shows white lower cabinets paired with wooden upper cabinets, separated by a black marble wall. This contrasting combination is interesting for a long, large kitchen.
61. Grey, Metal, and Diamond Plate
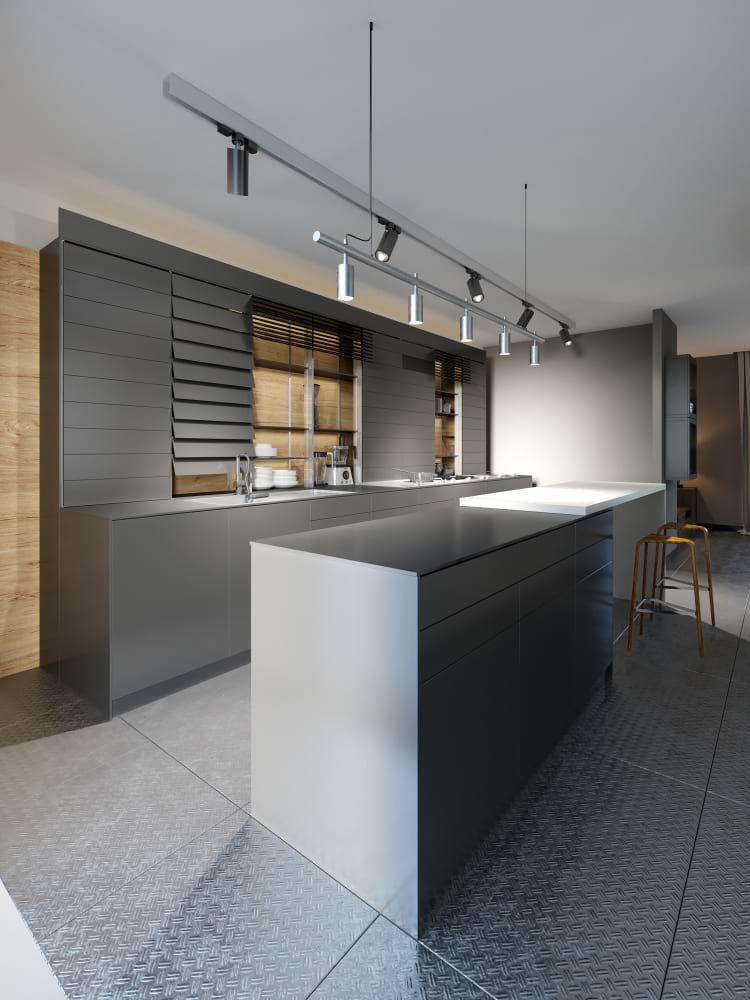
Grey combines well with metallic colors and white. Diamond-plate effect flooring is a great idea here, creating a strong industrial impression.
62. White, Wood & Grey Mix
A combination of white, wood, and grey. A white countertop joins a wooden one, surrounded by wooden cabinets and grey walls. Ceiling lights brightly illuminate the room.
63. Large Bright Kitchen Layout
A large, bright kitchen with a marble and wood island combining dark grey and white. Lighting plays a huge role here, facilitating meal preparation.
64. Distinctive Natural Patterns
An example of a countertop pattern with characteristic natural stone designs. It’s an interesting idea for a bright kitchen, featuring a wooden top with white cabinets in the background.
65. Brass Faucet & Cream Cabinets
A white countertop, cream cabinets, and grey finishing on the walls and island sides. A brass faucet is certainly an interesting addition here.
66. Muted Tones & LED Lighting
A dark, muted kitchen with a classic cream/grey marble-look countertop. Modern wood-look cabinets are enhanced by LED under-cabinet lighting and a fitting modern faucet.
67. White & Wood Island Cladding
A simple, bright kitchen featuring white cabinets and a white island top with wooden cladding. A metallic fridge pairs well with other equipment like the range and vent hood.
68. Light Marble Walls & Island
Light marble shades on the walls and white stone countertops on the island. The island is clad in wood, contrasting with the white cabinets against the wall.
69. Pastel Accessories & Pendant Lamps
Classic kitchen with dominant white. Hanging lamps, a pastel range hood, and black screen break the color uniformity. Pastel bowls and pots work well here.
70. Wood & Color Accents
A bright kitchen combining white with wood, featuring a dishwasher in the island. Colorful accessories can liven up the room if it feels too plain.
71. Gold Handles & Scandi Style
A white countertop with grey shades combined with wood and white cabinets featuring gold handles. This neat arrangement resembles Scandinavian style.
72. Wood Dominance & White Contrast
Wood dominates this idea, with a wood-effect cooktop and wall finish. Upper cabinets are wooden with lighting, while lower cabinets are white for contrast.
73. Brick Wall & Pastel Tones
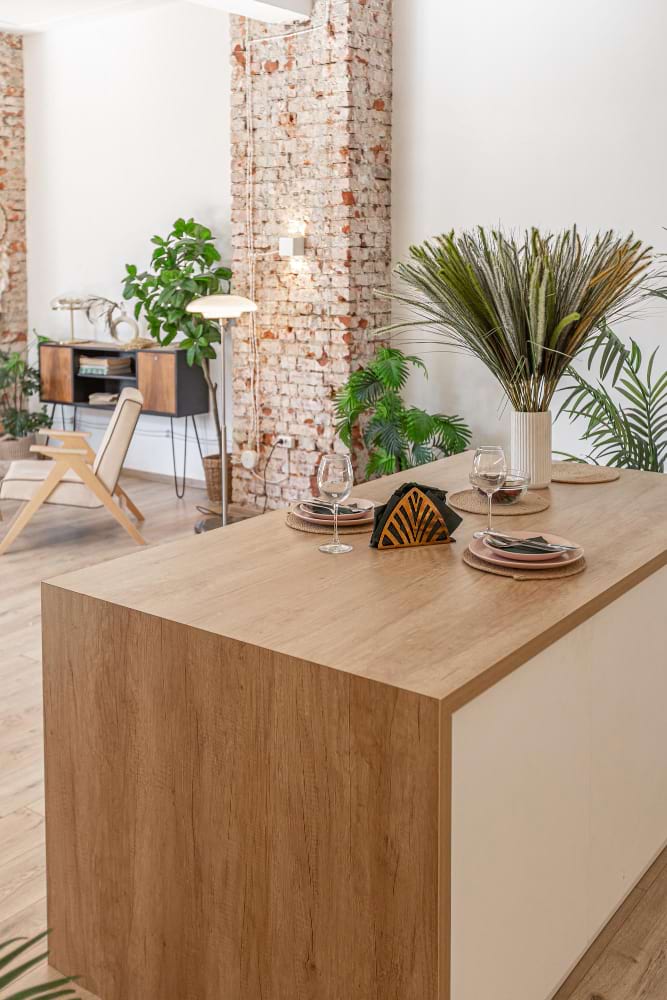
Lots of wood, an island with a wood-effect top, and pastel colors. A white wall contrasts with old bricks, creating a currently very fashionable arrangement.
74. Marble Edge & Dark Island
A marble slab with an interesting edge finish on a dark kitchen island. In the background, cream cabinets and marble wall finishes create an elegant style.
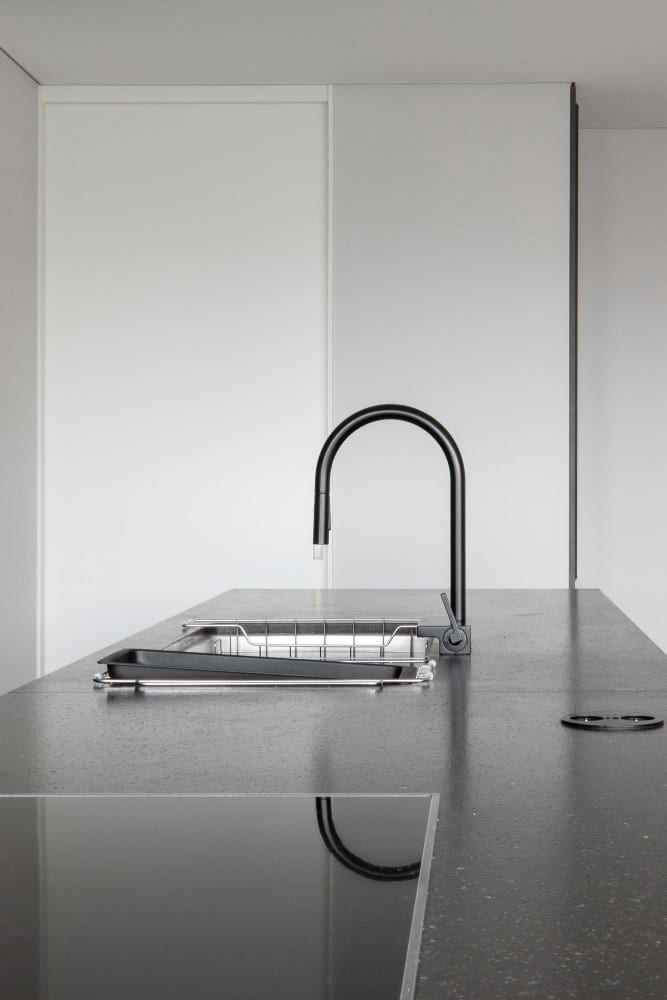
75. Minimalist Corner & Decor

A uniform kitchen slab, minimalist sink, and interesting metal faucet. Accessories like decorative bottles or a wooden cutting board are important in this arrangement.
76. Harmonic Pastels & Modern Fixtures

Minimalism with interesting pastels connected to a grey wall. A modern metal faucet, induction cooktop, and black sink create a decor full of harmony.
77. Light Stone & Cream Sink
A light countertop combined with white cabinets and marble-finished walls. A cream sink and metal faucet show how small additions can shift the style from modern to classic.
78. Terrazzo Walls & Wood Accents
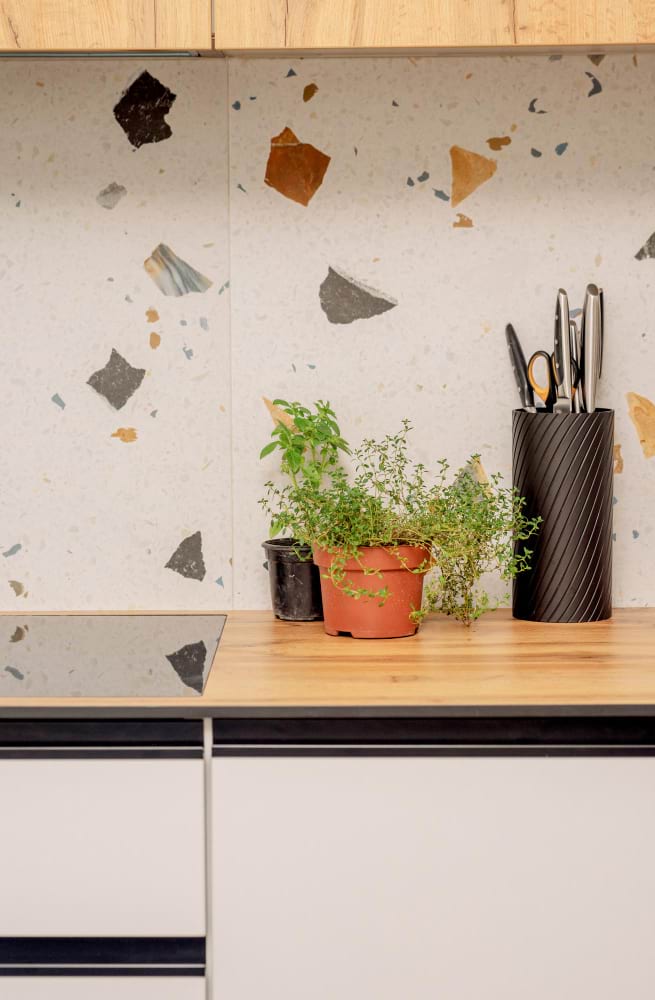
Colorful terrazzo walls add patterns. A wooden countertop, black cooktop, simple white lower cabinets with black handles, and wooden upper cabinets complete the look.
79. Matte Black Granite
Simple kitchen in a minimalist style featuring a matte black granite countertop. A black cooktop and faucet, along with a steel sink, contrast with white cabinets and walls.
80. Wood, Black Furniture & Grey Walls
A wooden countertop contrasts with black furniture, grey walls, and black pendant lamps. Classic white tiles on the wall brighten the kitchen.
81. Grey Granite Island & Steel Accents
A grey granite island and countertop pair with a steel sink and chrome faucet. White cabinets, steel strips, handles, and shelves create a clean look.
82. Light Marble & Open Shelves
A classic light marble island top with a steel stove and sink. Bright walls, open kitchen shelves, and grey floor finishes define this space.
83. Purple Cabinets & White Top
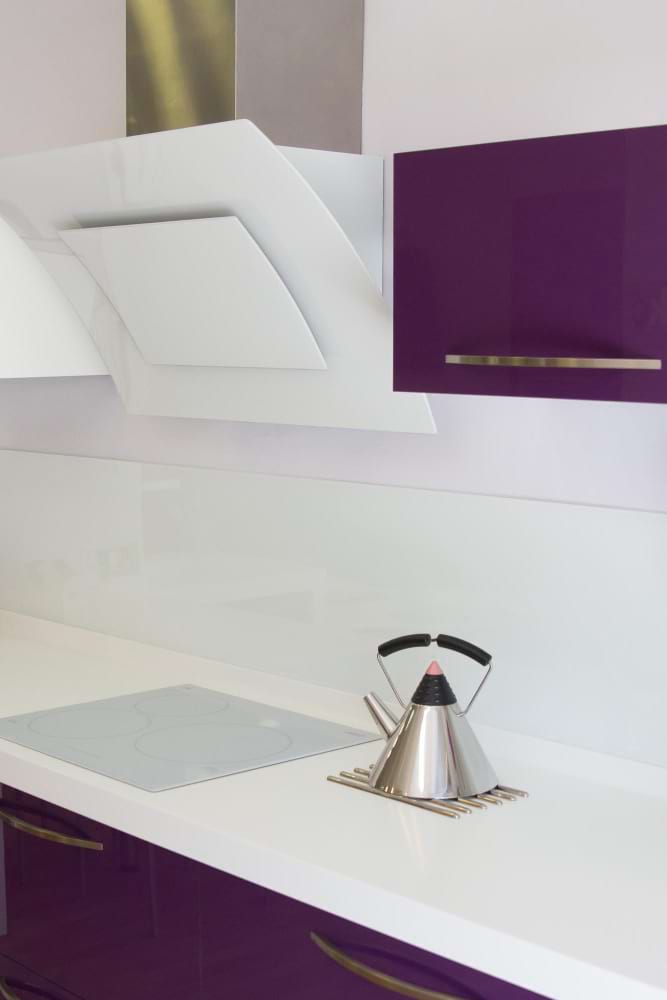
A unique kitchen with a white countertop, walls, hood, and cooktop. Dark purple cabinets with metal handles and metallic accessories stand out.
84. Patterned Floor & Mixed Woods
Patterned decorative floor tiles in grey shades. The island mixes two wood tones with a white finish. Upper cabinets are light wood, while lower ones are black.
85. Dark Wood & White Countertops
Dark wooden kitchen cabinets paired with white countertops and a white sink. A simple chrome faucet adds a functional touch to this classic setup.
86. White Marble & Brass Accents
Walls and countertops in white marble. Handle-less furniture in wood tones, white shelves, and a grey island are complemented by a brass faucet and sink.
87. Speckled Stone & Lighting
White marble walls with grey veins match a white speckled stone island. Minimalist white cabinets with lighting, a black cooktop, sink, and faucet complete the design.
88. Dark Wood & Matte Floors
Dark matte floor tiles provide a base for dark wood countertops and tables with visible grain. Brown upholstered chairs add comfort.
89. Brown Wood & Veined Stone
Brown wooden floor and upper cabinets contrast with white lower cabinets. The countertop and walls are white stone with grey veins and spots.
90. Elegant Gold-Veined Stone
An elegant stone island with brown and gold veins matches the wall cladding. Light wooden cabinets in grey shades are handle-less, paired with a simple chrome faucet.
91. Brown Stone & White Cabinets
Walls and countertops in stone with brown and grey shades. White cabinets with black handles, a white sink, and beige trim create a clean look.
92. Backlit White Marble Island
A white marble kitchen island with backlighting. White countertops and floors contrast with grey chairs on black metal legs and black appliances.
93. Glossy White & Light Wood
An island of white marble with grey veins paired with a light wood top. Minimalist glossy white cabinets and a modern glass lamp create a sleek look.
94. Matte Black Granite & Wood
A black matte granite countertop with white veins sits atop wooden cabinets. A black cooktop, grey floor, and open shelves complete this industrial vibe.
95. Backlit Marble Sides

A white island top featuring patterned marble sides with backlighting. White walls and floors contrast with grey chairs on black matte metal legs.
96. Glossy Granite & Fluted Wood
An impressive glossy patterned granite countertop. White fluted wooden cabinet fronts with matte gold details and black handles look stunning against white wall tiles.
97. Grey Matte Island & Marble Floor
Marble flooring and walls surround a grey matte island. A white countertop sits on wooden cabinets, illuminated by simple bright lamps.
98. Wood & Black Accents

Light marble flooring pairs with wood-tone furniture featuring black handles. Black appliances and chairs contrast with the light stone island and white upper cabinets.
99. Blue Cabinets & Matching Granite
Wooden floors and blue kitchen cabinets are complemented by marble wall tiles. Granite countertops in the same shade create a cohesive look.
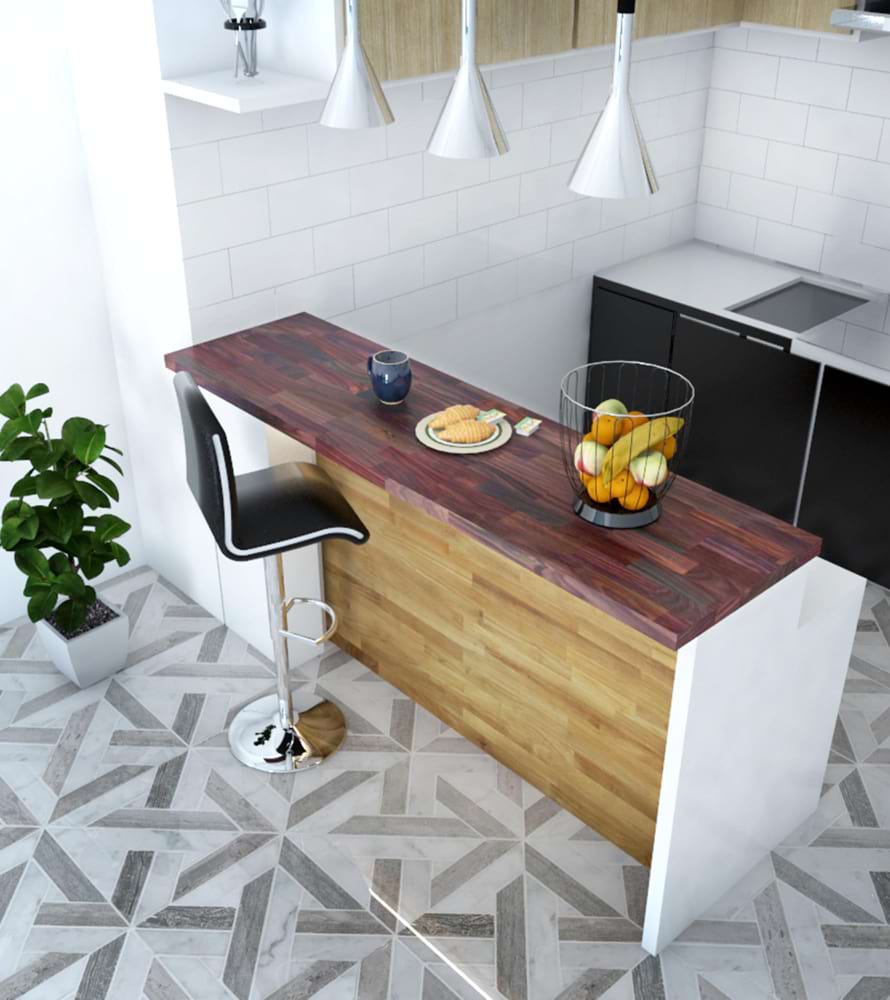
100. Open Kitchen with Black Furniture

Light stone floors and a white-grey granite island contrast with black backlit furniture. The kitchen opens to a living room with matching black furniture and leather chairs.
101. Mini Bar & Dark Wood
Light stone floors and grey countertops on dark wooden furniture. A mini-bar at the island matches the kitchen furniture color, set against glossy white walls.
102. Grey Tiles & White Cabinets

Grey floor tiles provide a base for light granite countertops and island. White cabinets feature black accents for a modern contrast.
103. Blue Pastels & Patterned Walls
Light granite countertops match wall tiles with the same pattern. Pastel blue handle-less cabinets and matching blue chairs create a soft look.
104. Black Granite & Grey Matte Floors
A kitchen featuring black granite countertops and walls. Grey kitchen cabinets and a matte grey floor are complemented by natural wooden accessories.
105. Black & White Geometric Floor
A modern kitchen in white and black. The white floor features patterned tiles. A white countertop and upper cabinets contrast with black lower cabinets.
106. Black Granite & Grey Floor
Black granite countertops, island, and wall tiles create a strong look with black cabinets. A grey floor provides a necessary contrast.
107. Light Stone on Black Cabinets
Light countertops and flooring create a striking contrast with black cabinets. The wall features cladding in the same shade as the countertop.
108. Wood & Light Granite
Wooden kitchen cabinets look great with countertops and an island made of light granite. Open upper cabinets are also wooden, with flooring matching the countertop.
109. High-Gloss Grey Island
A high-gloss grey kitchen island is paired with a light countertop and floor. Open shelves with backlighting add a modern touch.
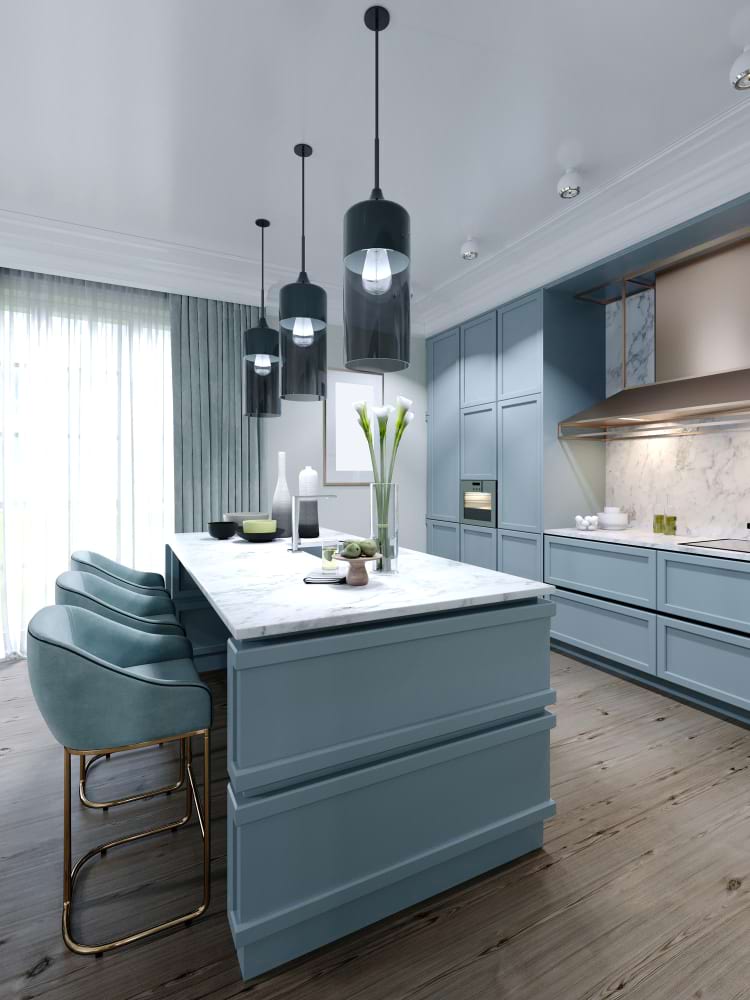
110. Blue Cabinets & Marble Tops
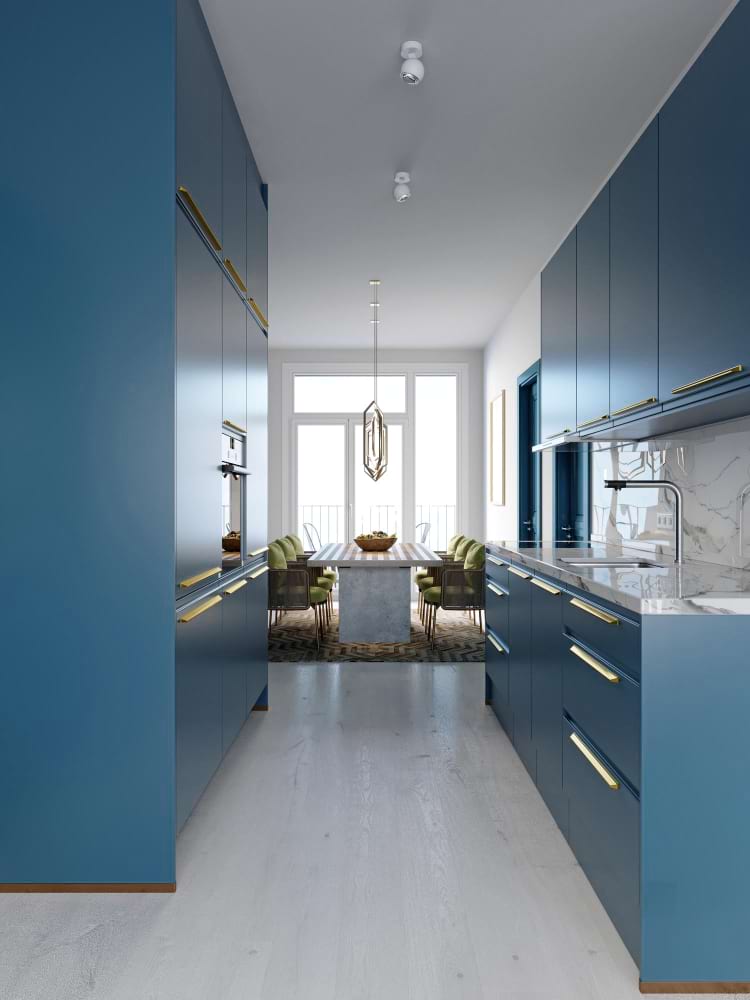
Light marble countertops harmonize beautifully with blue kitchen cabinets, creating a fresh and elegant design.